The Desperate Times quest series in RuneScape begins with a new adventure. It picks up after encountering Jas in Sliske’s Endgame and includes Seren. The following instructions will walk you through the journey, as well as the conditions and prizes you will get. It’s also a long quest, so you’ll want to know what you’re getting yourself into and what you’ll need on your character before you start.
The following guide will include:
- Requirements for Desperate Times RuneScape Quest
- Step-by-step Guide
- Quest Rewards
Requirements for Desperate Times RuneScape Quest
You’ll need to be level 50 in Mining, Smithing, and Divination to complete the quest. To enter the Black Knights’ Fortress, you’ll need 3 rune bars, 2 runite stone spirits, 10 mind runes, 10 gleaming energy, a Skull of Remembrance, or equipment. Finally, you’ll need either a Charos necklace or an old necklace.
It’s also a good idea if you have ties to fairy rings. To get to the Varrock Dig Site, you’ll need a Dig Site pendant. Two teleports to Varrock and two teleports to the Phoenix lair would be extremely useful.
Step-by-step Guide
Burthorpe Castle – Start The Quest
To begin, go to Burthorpe Castle and chat with Seren on the first floor. You’ll be asked to join her council, and she’ll explain that life on Gielinor is considered fodder for the elder gods’ unborn children.
The council aims to show that their lives are valuable and should not be considered food and to prepare an appeal to the elder gods. Bik is the first of these elders, and there are hopes to please them by building a garden. You’ll then talk about where to look for a good spot, as well as your seed selection and staff.
Find Seeds, Task Force and Land
To begin, talk with Zarador about sorting the land so you can use the Feldip Hunting Grounds. Alternatively, you may request the Morytania swamps from Vanescula Draken, or the northern desert from Osman.
You’ll still need a task force, so ask Brundt the Chieftain to use Fremennik, Sir Amik to use White Knights, or Moia to summon an undead force to assist you. Finally, chat with King Roald, Azzanadra, or Garlandia to locate the seeds. If you’ve decided who you want to go with, affirm your decision, even though the council will deny it for personal reasons.
This will continue with three of your selected combinations until Kerapac appears, stating that Seren’s scheme will fail and offering an alternate path forward. Using the Elder Artefacts entails setting the elder gods to rest for good. Except for Seren, the council will consent to this proposal.
Meanwhile, Thok would say that he will frighten the elder gods away, prompting Kerapac to take you and Thok to The Needle, located west of the Piscatoris Fishing Colony.
Arriving At The Needle

Talk with Kerapac until you’ve arrived at the Needle. He’ll inquire whether you can sense the artefact’s strength. Regardless of which alternative you choose, Kerapac can say that he can charge the Needle, but only if temporal instabilities are avoided.
You can close the five windows that show by clicking them, but you must then return to Kerapac. He’ll tell you that the Elder Artefacts have a kind of conscience and that in order to progress, he’ll need to locate the mage known as Charos.
With that in mind, make your way to Charo’s crypt, located underneath McGrubor’s Wood. If you like, you can use a home teleport to get to the Seer’s Village lodestone. Alternatively, you will use the Fairy Ring to go south-east to a mysterious hole.
Check out the coffin in the tomb and find a message from Charos. The letter would say, somewhat eerily, that Charos knows what you’re up to and that you’ll have to play a game in order to find him. The game revolves around solving a riddle to find three keys hidden in three different locations. These keys can be used to reactivate his old necklace, which will reveal his true identity.
Necklace Key Locations
The First Key Location
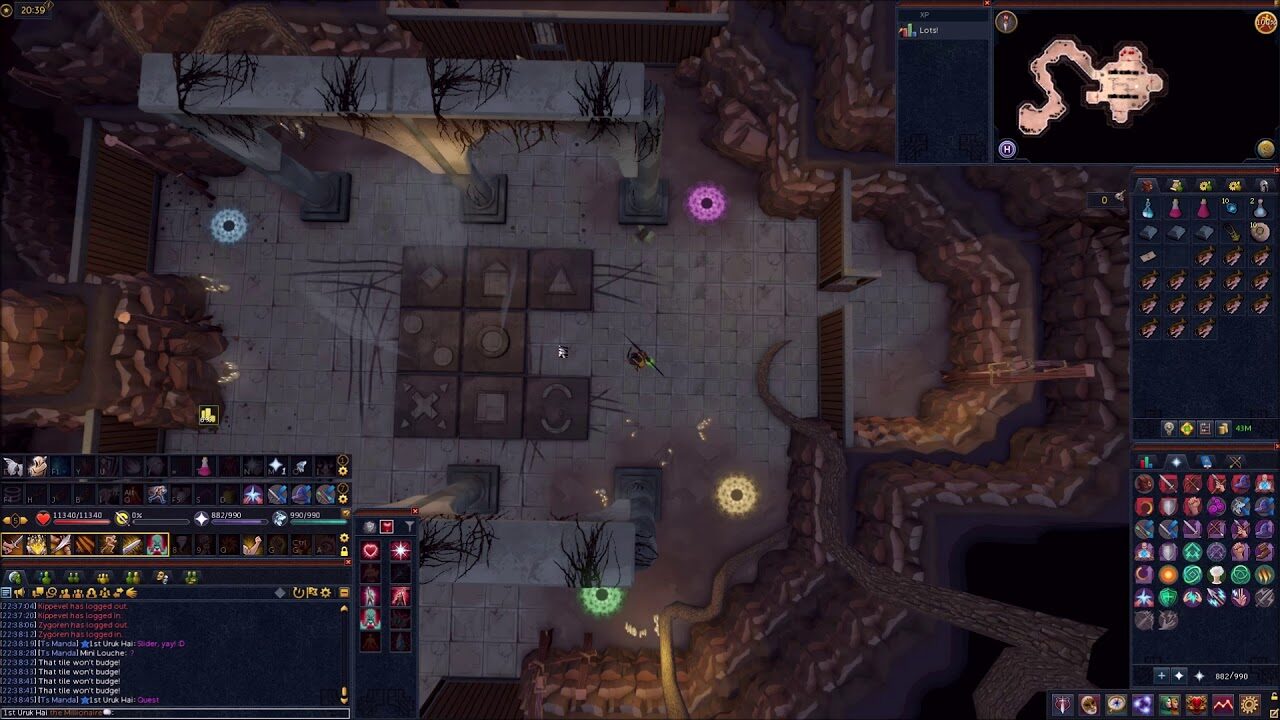
You’ll need to go to the Varrock Dig Site first. Move inside when you see a gathering of people clustered around a mysterious portal. You’ll see a space with a puzzle in the center that leads to a series of other rooms after you’ve entered.
To solve this mystery, go to the doors that lead to chests and open them by standing on magic portals on the stage. Once you’ve unlocked them, you’ll need to solve a riddle to access the chest, which will reveal a four-letter code to get into the lock.
If there’s a recipe note in the office, your code will be the first letter of the ingredients listed in order, so FCDE. It’s a recurring motif in the room, where it surrounds the first letter of each word on various objects.
This is especially true in a room with four things on the floor that you can’t pick up. The code PJCD is determined by the first letter of each object. If it’s the room with the coins on the floor, the answer is determined by the number of coins present.
The first letter of the shields in order is used in the room with the plaques, which spells LFDV. There’s a space with just one thing on the ground, so you have to choose between BEER, DART, or CAKE. Finally, if you’re in a room with a weed, the code is, of course, HERB.
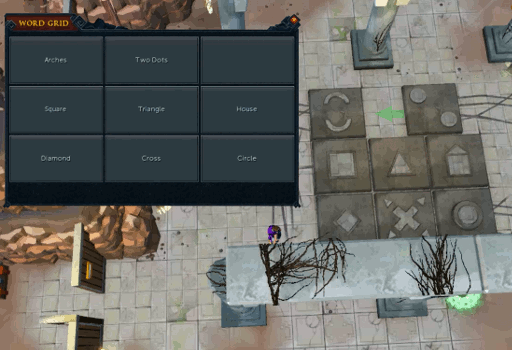
After that, a grid of words will appear, which can be used to solve the puzzle. This strategy is identical to the Treasure Trails puzzle box, which will open all of the chests. Each word describes a tile, and you need to have each tile in the same position that goes with its location in the grid itself.
Second Key Location

You’ll need to go to the first floor of the Varrock Palace to locate the second door. This can be accessed via the secret gateway behind the clothing screen. Another spot is the Black Knights’ Fortress’s first floor.
The portal is located in the southeast room, close to the entrance. To gain entry to the castle, you’ll need an outfit, which you can find on the armor rack on the Edgeville monastery’s outer wall to the northwest.
Third Key Location
To get the last keys, solve the slider puzzle spaces. You’ll get a bloodied scroll with the word URIT written on it several times until you get the third key. RELDO is spelled out by reading the scroll with various characters. The player would then recommend that you visit Varrock Palace Library, so that is where we will go next.
Build The Device

Now that we know where we need to go, go to the Varrock Palace and speak with Reldo in the library. You can now summon Charos by using the necklace you’ve charged.
Kerapac and Thok would arrive to lay out the plan of attack for the Needle, with Kerapac allowing Charos to construct his own gadget to aid in the Stopping of the Needle. Thok, on the other hand, will have a different idea and will be dispatched by Charos to choose his own route.
Charos would then call for three rune bars, two runite stone spirits, and ten gleaming energy and mind runes to assist in the construction of Kerapac’s device. Give these things to Charos, who will build the unit once you have them. Then you’ll be advised to return to the Needle and find him there.
Enter The Needle
Gail attacks Charos and Thok just as he is about to use the device on the Needle. Kerapac would then send you into the Needle as he diverts Gail’s attention away from you. This will transport you to the depths of Guthix’s Cave, where you must defeat Sliske clones in order to retrieve their shattered mask fragments.

They spawn as you step into specific locations, so make sure you’re carefully exploring your surroundings to ensure you see them all. After defeating the five clones, the shards will combine to form Sliske’s mask, which you can now put on to turn into Sliske. Go to the cave’s end to find and destroy Guthix, after which you’ll be returned to Naragun.
You must locate Armadyl, Bandos, Saradomin, Seren, and Zamorak’s five memories here. Guthix can be found near the Fairy Ring, so chat with him to be taken to his cave. Turn each of the mutable animas while you’re inside.
There are four flips in all, and the light orbs can cross paths with each other a number of times. You’ll be in a clone of the Empyrean Citadel after you’ve completed this. Sliske will emerge in the center and speak with you about the gods. Then, with Gielinor, enter the space to the west. You must then enter the room using Agility shortcuts and go on through all of the rooms before you reach a new spot.
Finishing The Quest
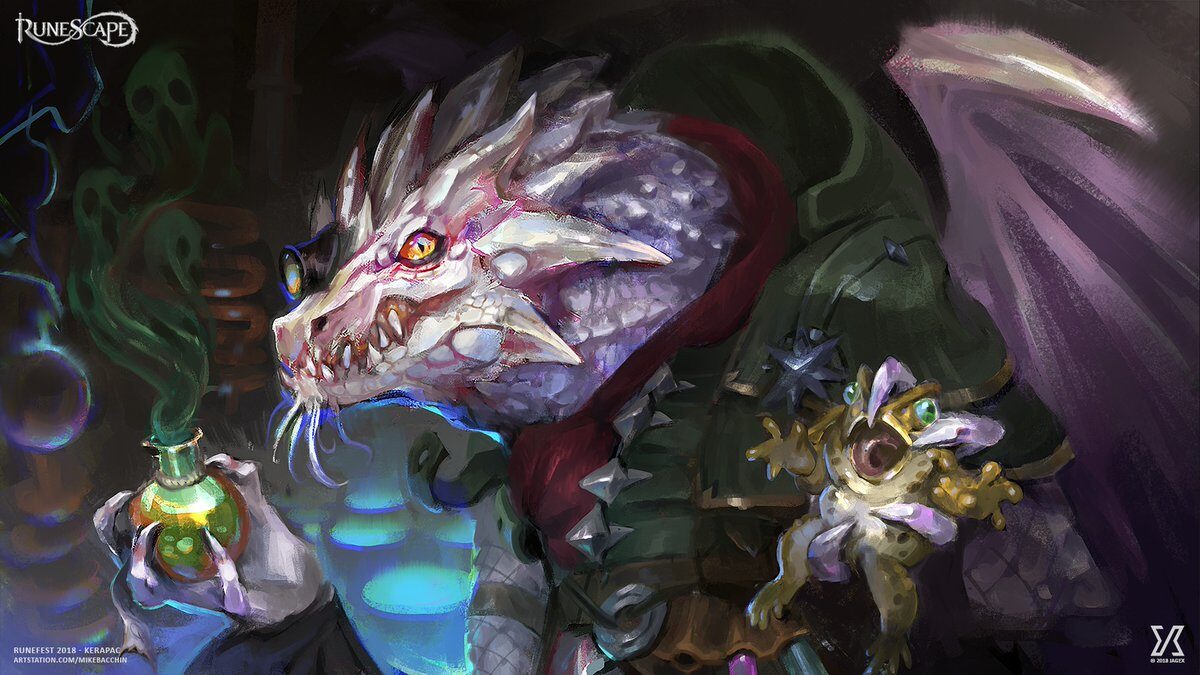
You’ve arrived at Sliske’s Labyrinth. To progress through this section, you must change the redirect anima to Kerapac. At the end of the Dragonkin Laboratory, players must thaw out the frozen nodes in the final room.
The memory wisps can be found in the northeast and southeast. Listen to Kerapac discussing how to return to Orthen with his son Vicendithas. A cutscene can play after all of this has been done. Gail gradually transforms back into Primrose, her human form, in this scene.
Kerapac can then use the Elder Artefact’s teleportation and flight abilities to prepare the net step. As a result, chat with Charos, who will vent his grievances, whilst Primrose will state that she wants to see her mother.
Now you must return to the council and remind them of the events that have occurred. Seren will now be aware that Kerapac intends to use the Needle’s strength to kill Gielinor as a sacrifice to the elder gods. Seren is inspired to devise a plot to assassinate Kerapac with the help of Charos and the rest of the council, putting an end to the present mission.
Quest Rewards
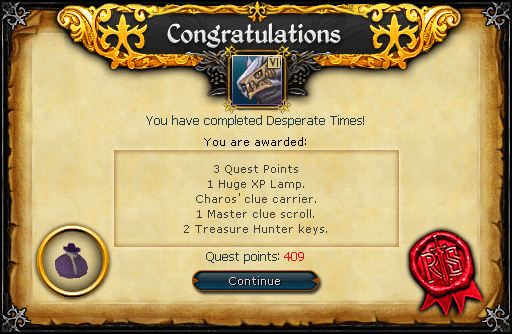
You can get 3 mission points for completing this quest. You’ll also get a master clue scroll and a pocket slot object named Charos’ Clue Carrier. You’ll also get a massive XP torch, as well as two Treasure Hunter keys and two Hearts of Ice.
You can also unlock some music tracks if you complete the Desperate Times Runescape search. The Chamber of Guthix, as well as The Charos Enigma, Seren’s Plea, and True or False, are among them. The True or False track can also be unlocked during the Fremmenik series’ Hero’s Welcome search.
Finally, you will get the Desperate Times award for finishing this intermediate quest. It’s a long quest, but it’s well worth your time because it has a wonderful story and some pretty cool rewards along the way.

