Home Blog Page 317

Make YouTube Videos and Have a Successful YouTube Channel

0

YouTube has around 122 million active users across the world. With the rise of vlogging culture, more and more people are inclined toward starting their YouTube channels. Starting a YouTube channel has the potential to provide a handsome amount of passive income. There’s a large scope for video creation as the demand for video content is increasing with each passing day. Moreover, video content is also becoming popular among digital marketers. 

However, creating a successful YouTube channel or becoming a successful YouTuber is not an easy job. You need to put in extra effort to make your videos popular and get more and more likes. Read further to get into details about creating a YouTube channel and monetizing your videos.

How Can We Make Money on YouTube?

As a content creator on YouTube, you have to meet certain criteria to get your account monetized. Moreover, many ways get you to earn a handsome amount, like subscriptions, endorsements, sponsorships, etc. The following are the common ways that help you to earn money through your YouTube videos:

Sponsorship & Endorsements: YouTube sponsorship is just like business sponsorship. You need to have a loyal audience to get your YouTube channel sponsored by brands. With a strong audience and fan base, you unlock more chances of getting larger sponsorships. 

Advertise as YouTube Partner: Advertising as a YouTube partner is the easiest and the most common way to earn money. It helps you monetize your content, use custom thumbnails, and allows you to broadcast a Google Hangout. Moreover, you also get the chance to participate in various advertising programs worldwide.

Merchandise: Merchandising is another lucrative form of earning money through YouTube. Once you have a strong and loyal audience, you can easily convince them to purchase any merchandise that you promote in your YouTube videos. You can also use your YouTube channel for marketing purposes.

Become an Affiliate: With the rise in influencer marketing, earning money through affiliate programs has also become popular. As an affiliate partner, you have to encourage and convince your audience to visit your partner brand’s online store. Moreover, you need to ensure that you are being honest with your audience. You can connect with the top brands by reaching out to them or make them contact you by creating valuable content.

Video Editing is Important

Video editing plays an important role when planning to create a successful YouTube channel. In other words, it can be said that video editing is the key element of presenting YouTube videos. Your video content should be attractive enough to engage a large number of audiences. There are many YouTube editing software in the market, and we will briefly introduce Wondershare Filmora in the post, which is quite popular among YouTubers.

You can easily create impressive videos by using the amazing features of Filmora. It has an easy-to-use interface that allows you to experiment with your videos. It is one of the best video editors for YouTubers, with many easy-to-use built-in features that help you to create, edit, and crop videos within no time.

Filmora allows you to access the following features:

  • It provides advanced video editing features like split screen, keyframing, speed ramping, motion tracking, screen recorder, title editing, etc.
  • It gives you access to add customized effects to your YouTube videos, including video effects, green screen, mask & blend, AI portrait, Boris FX, and NewBlue FX.
  • You can also synchronize the effect of audio with video using audio features like audio ducking, text-to-speech, speech-to-text, audio visualizer, etc.
  • It allows you to edit the color contrast of your videos using special features like color match and color correction.
  • It is compatible with both Windows and Mac iOS and is available to download for free from the official website.

To top it all, Filmora makes video editing more than easy with just three simple steps:

  • Launch: Download and launch Filmora on your PC/Mac and import the media files you want to edit.
  • Edit: Edit, crop, and adjust your audio video selection on the timeline to create a video.
  • Add effects, filters, titles, transitions, etc., to add more fun to your video.
  • Export: At last, review and export your final video.

Analyze the Performance of Your Video

YouTube analytics is necessary to analyze and improve the performance of your video. It is easy to grow your YouTube channel with YouTube analytics, as performance analysis is the key to growth and improvement. You might have many questions in your mind while running a YouTube channel like – Am I able to attract viewers to my YouTube channel? Are my YouTube videos performing well enough? Easy, you can get the answers to all these questions through YouTube analytics.

You can get different reports regarding your performance as a YouTuber from the analytics section by signing in to the YouTube Studio. You can view the performance of your YouTube channel through various tabs given below:

  • Overview Tab: Provides the summary of the performance of your YouTube channel.
  • Content Tab: Provides the summary of the reaction of your content viewers.
  • Reach Tab: Provides the summary of your worldwide reach.
  • Engagement Tab: Provides the summary of how much time an average YouTube viewer spends on your channel.
  • Audience Tab: Provides the summary of your audience type based on age, gender, interests, etc.
  • Revenue Tab: It lets you determine and track your YouTube earnings
  • Research Tab: Provides the summary of common and trending searches.

Sum Up

Starting and creating a YouTube channel has never been difficult. However, with the average number of viewers and vloggers increasing with each passing day, it is tricky to maintain a successful YouTube channel. Just focus on growing your YouTube channel by uploading high-quality video content. The more valuable content you provide, the more will be your audience engagement. 

You can easily create amazing and effective video content using Filmora to attract a large number of viewers. So, why are you waiting? Download Filmora and start creating lucrative video content to grow your YouTube channel.

What .com.google.Chrome Files Are: Can You Delete Them?

0
white smartphone near laptop

Every once in a while, you will encounter files on your smartphone or device that will make no sense to you. Among these files are the .com.google.Chrome files that you might fold in your download folder. 

These .com.google.Chrome files reappear frequently, so you might want to know ways how you can get rid of them. Before we cover how you can remove these files, let us learn what .com.google.Chrome files are first. 

What .com.google.Chrome Files Are

The .com.google.Chrome file is nothing to worry about. These are nothing but storage or files created by the Google Chrome browser. If you go to your download folder on Chrome or your phone or computer, you will notice a file named com.google.Chrome. They usually contain nothing but cache files from various downloads or websites – especially if you use your phone a lot. 

Sometimes, these files contain unspecified data. It can also contain data from some interrupted downloads. For example, you might have wanted to download a photo or file from Chrome, and somehow you paused the download, the com.google.Chrome file will store those incomplete data. 

Also, if you fail to download something due to a poor Internet connection or technical glitch, Chrome will create that file storage to store the interrupted data that the system cannot properly store on the device. Usually, you might be unable to open the data stored there as those data or files are, more often than not, broken. 

Remember too that sometimes, you will notice variables attached to the file name. It mainly happens when there are various .com.google.Chrome files on the Chrome browser. 

The variables are never specific, so sometimes you might see .com.google.Chrome.DCJKGH in the filename. Or, at times, you will see .com.google.Chrome.RFHNO, and similar others. 

Can The .com.google.Chrome File Store Malicious Data Or Viruses?

As discussed a while ago, .com.google.Chrome files usually just contain junk or unnecessary data. So, there is no malicious data or virus stored there. However, if you are trying to download something from illegal or unreliable APK sites or websites, you must be careful. This is since files stored on those sites often contain malicious data or viruses. 

Moreover, if you try to download such problematic files and the download stops in-between for some reason, then the com.google.Chrome will store the virus or malware from those files. Scary, right? 

Sometimes, the com.google.Chrome file is created by some malicious third-party applications or software. And such files can contain viruses or malware. You can run a security program scanner on your computer or phone to confirm that.

If you are on a PC, running Microsoft Defender will inform you whether these files are safe or pose a threat to your device. 

Can You Delete The .com.google.Chrome Files From Your Device

Yes, you can delete the .com.google.Chrome files easily on your phone or computer. 

However, if you are not familiar with how to delete them or when to delete them, run a scanner first. You must delete the files if the scanner specifies them as threats or viruses. 

Also, if they take up too much space on your device, you can delete the files to free up some space. 

There are various ways to delete the .com.google.Chrome files. 

1. Smartphone Download Folder

If you intend to delete the .com.google.Chrome file on your smartphone, you can go to the Downloads folder. This is because these files are often stored there. 

Below are the steps.

A. Open the Downloads folder from your Home screen. If you cannot find the folder, type in the word “My Files” on your home screen’s search bar. Then, open the Files result.

B. You will need to open the Downloads section from the files section.

C. Then, check mark next to all the .com.google.Chrome files you can see.

D. After you finish ticking off the files, click on the Delete option at the bottom of your screen. On some phones, you might need to click on the three-dotted icon to select the Trash or Delete icon.

If you follow those steps successfully, you can get rid of the .com.google.Chrome files.

2. PC Downloads Or Chrome

The PC version of Google Chrome stores the .com.google.Chrome files on the local download folder. Or, you can use your PC’s Chrome to delete the files as well. 

So, to carry out this method, here are the instructions.

A. Open the This PC folder and then head over to the Downloads section from the left panel.

B. Then, select the particular .com.google.Chrome file and right-click on it to choose the Delete option.

C. Or, with your mouse, you can drag over the multiple .com.google.Chrome files and select the Delete icon.

D. Do not forget to go to the Bin icon and delete the files too from there.

E. In case you cannot find the files in the Download folder, open Chrome and click on the three-dotted icon to select the Downloads section.

F. After which, click on the Open Downloads Folder located in the screen’s upper-right corner.

G.Then, you need to choose the .com.google.Chrome file and right-click over it.

H. After clicking the Delete icon, go to the Recycle Bin icon, usually at the top-left corner of your PC.

I. Lastly, select Empty Recycle Bin to remove the files completely. If you do not delete them from the Bin, you might still see them on your PC or these malicious .com.google.Chrome files might affect your PC.

Those are pretty much about how you can delete the .com.google.Chrome files. Now, let us find out the questions most people ask about the topic. 

Frequently Asked Questions

1. Is It Safe To Delete .com.google.Chrome Files?

Yes, it is perfectly safe to delete the .com.google.Chrome files from your phone or PC. We repeat, they are basically unnecessary files or junk cache files. Without these, your smartphone or computer will work better. However, fortunately, the OS does not depend on these files to function.

2. Can Pirated Movies Or Files Affect The .com.google.Chrome? 

Yes, files or movies from pirated sites are often not safe to download. If they are already infected with malware or virus, they will render the .com.google.Chrome files or cache corrupted. 

3. What Is The Size Of These .com.google.Chrome Files?

Typically, the file size of the .com.google.Chrome files is not over a few kilobytes. But if they contain too many interrupted or paused downloads, they are larger. They can take up to a hundred megabytes or a handful of gigabytes on your phone or computer storage.

4. Can You Check The Size Of These .com.google.Chrome Files?

Yes, you can check the size of the .com.google.Chrome files. Visit the Downloads folder on your phone and PC, and open the File folder to check the size at the top left corner of the screen. 

5. Will Chrome Crash If You Delete The .com.google.Chrome Files?

No, Chrome will not stop working nor crash if you delete the .com.google.Chrome files. You ask why? This is because they are nothing but unnecessary data, seriously. 

Fixed: PS4 Keeps Disconnecting From The Wi-Fi

0

Playing with the PlayStation 4 gaming console is an experience beyond belief. There are several other things you can do with the PS4, such as using the Internet. But, at the same time, there are instances you might encounter problems, such as the PS4 disconnecting from the Wi-Fi consistently. In this article, we will tackle how to fix this issue. Read on. 

Why Does My PS4 Keep Disconnecting From The Internet?

PS4 Internet connection issues are very common, but sometimes, it can be difficult to figure out what is causing the problem. In most cases, the PS4 is responsible for the issue. The problem is usually related to its software which you can fix easily. 

In some rare cases, the problem could be router placement and signal interface caused by your other devices. 

However, no matter what the reason is behind the problem, there are several things you can do to fix the PS4 disconnecting from the Wi-Fi consistently by taking a look at this guide. 

How To Fix Your PS4 Wi-Fi Connection Issue

Select A Frequency Band Manually 

The old PS4 only supports the 2.4 GHz frequency band, while the PS4 Pro supports both 2.4 GHz and 5 GHz bands. One of the reasons most PS4 Pro gaming consoles face this issue with the Wi-Fi is the automatic selection of the band. 

Your PS4 Pro keeps switching between 2.4 GHz and 5 GHz frequency bands to always use the faster one. But, most of the time, your game will begin lagging or lose connection for a few seconds. 

In case you have a dual-band router, you can try selecting a band manually from the console’s network settings. Usually, the 2.4 GHz band offers better coverage, but its speed is slower, and the 5 GHz band offers less coverage but provides a faster Internet connection. 

You can try both hands. Then, set the one that works better for you. Here are the steps.

First, go to Settings. Then, to Network. Then, to Setup Internet Connection. Then, use Wi-Fi. Easy. 

Then, look for “Options Menu” at the bottom of your screen and select this. 

Lastly, open Wi-Fi Frequency Bands and select 5 GHz or 2.4 GHz. 

Close The Application And Open It Again

Does the simplicity of this method seem not sufficient to fix the problem? Sometimes, properly closing the game and opening it again can fix the connection issue.

For example, if you are experiencing this Wi-Fi bug while playing GTA V, you can hit the home button, and once the home screen launches, press the options button on your controller. A menu will open up. You must select the game option and relaunch the game. If this does not work, continue reading for the other options. 

Reset The Console 

In particular cases, resetting the PS4 can fix the bug, which only takes a few minutes. Follow these steps to reset your PS4. Later as your read, there is a note that you must know. 

First, turn your PS4 fully off. Unplug the power cable from the back of the unit. Wait for around five minutes before plugging the power cable back into the console. 

Afterward, hold the power button for eight to 10 seconds and wait for the second beep. Connect the DualShock 4 controller to the PS4 using a USB cable. Select “Initialize PS4” using the X button. 

Note: Resetting your PS4 console will remove all the data, including the installed games. Make sure you back up your PS4 saves before resetting the console. If you do not want to wipe your data, follow the same steps, except for the last step, as you will instead choose “Restart PS4” instead of the “Initialize PS4” option.

Reboot The Router

This method starts with you unplugging the router’s power cable and plugging it again after 10 to 15 seconds. Allow the router to power up and try connecting it with your PS4. 

If the router is causing the issue, hopefully, you will not experience any connection drop. If still, this does not work, contact your Internet Service Provider. Or you can also test the Internet speed manually using the PS4’s Test Internet Connection option.

Delete The Game Fully And Reinstall It Again

Some individuals only experience this Wi-Fi disconnection issue while playing certain games like Call of Duty 4: Modern Warfare (that is how specific we can be). If you are among these people, you can try removing the game completely from the hard drive and reinstalling it. 

Steps On Deleting A Game From PlayStation 4

First, navigate to the game in the Menu. Then, highlight the desired game. 

Press the options button on the PS4 controller. Once done, select Delete from the menu, tap confirm, and the game will be deleted. 

Once the game is uninstalled, you can install it again by using the physical disc. Or, if you purchased it from the PlayStation Store, you can download it again. Simple, isn’t it?

If that still does not work, other options include rearranging your setup, changing DNS settings on PS4, setting up a static IP address for the console, and rebuilding the database on PS4. Read further to know the details. 

Rearrange Your Setup

As mentioned earlier, signal interference can also cause these connection issues. If there are unnecessary devices around your modem or router, remove them from there. 

Also, try placing your PS4 where you get the best Wi-Fi connection in your house, or place the Wi-Fi router close to the PlayStation 4.

Change The DNS Settings On Your PS4 

Changing the DNS or domain name system of your PS4 can also fix the Wi-Fi drop-off issue. And, it may also provide better Internet speed. 

There are several high-performance DNS, but we recommend the DNS of Cloudflare or Google. Up next are the steps on how to do this. 

First, open PS4 settings. Then, go to Network. Then, to Setup Internet connection. 

Select Wi-Fi. Then, choose Custom. Then, choose Automatic for IP address settings. Afterward, select Do Not Specify for DHCP Host Name.  

Once done, select Manual under DNS Settings. Enter 8.8.8.8 as Primary and 8.8.4.4 as Secondary DNS. Then, choose Automatic for MTU settings. Afterward, select Do Not Use under Proxy Server. Finally, hit test your Internet connection. 

Set Up A Static IP Address For PS4

If your IP settings are kept automatic, then you are probably using a dynamic IP address. Dynamic IP addresses change when your ISP decides to assign you a new address or when you reboot your router.

However, static IP addresses do not change. It is why static IPs are usually more stable regarding connectivity. 

Keep in mind also that this method will change your local IP but not your public IP.

Step-By-Step Guide On Changing The IP Address On PS4

First, head over to Settings > Network > View Connection Status. 

Note down or take a picture of the IP address, Subnet Mask, and Default Gateway before returning to the previous menu. 

Proceed to Set Up Internet Connection > Use Wi-Fi. 

Choose Custom > Manual.

Next up, enter the first three numbers (three sections) of your IP address. Then, pick any number from 2 to 25 as your last number (section). 

Then, enter the Default Gateway and Subnet Mask that we asked you to note down or take a picture of previously. 

This time, choose Automatic for MTU settings. Then, choose Do Not Use for Proxy Server. 

Test your Internet connection and see if the Wi-Fi works now. 

Rebuild Database On PlayStation 4

Rebuilding the PS4 database is a well-known solution for fixing software-related bugs, such as our topic right here. But, it may take you 15 minutes to an hour to complete the process. Worry not, because in most cases, it is worth trying this method if the other solutions are not working for you. Here are the steps.

First, turn off your PS4. Second, press and hold the power button for eight to 10 seconds. Doing this boots up your PS4 in safe mode. 

Third, connect the DualShock 4 controller to the PS4 using a USB cable. Fourth, press the PlayStation button on the controller. 

Fifth, go down and select “Rebuild Database” using the X button on your controller. Wait until the process is done; your PS4 will automatically boot up. 

Lastly, sign in to PlayStation Network, connect to Wi-Fi, and see if you still face connection issues while gaming.

Take note: After rebuilding the database, some users report they find their games missing from the game menu. Do not panic. You can restore them from Settings, then to Account Management, then to Restore Licenses, and hit the Restore button.

What If Nothing Works? What Can I Do?

If none of the solutions discussed above worked (hopefully not), the best option is to connect your PS4 with an Ethernet cable. Ethernet cable connection provides reliable Internet. Sometimes, the speed can even be a hundred times faster than the Wi-Fi connection. 

Here is how to do this. First, connect the Ethernet cable to the router’s Ethernet ports and the PlayStation 4. Then, turn on the PS4 and the router. Go to PS4 Settings. Select Network, then Set Up Internet Connection, then Use LAN Cable. Easy.

Final Words

Overall, the steps you learned about earlier, including the alternative solutions if none of the methods worked for you, should fix the PS4 consistently disconnecting from Wi-Fi. If there are information you want to add or you want to share more about this topic, interact with us here at PVP Live. 

How to Start Freelancing Work With No Experience

0

Are you looking to start freelancing, but have no experience? Freelancing can be an advantageous way to earn extra money, gain valuable business skills and learn about a different work environment. It can also help you further your career, as a freelancer has more flexibility in what they do. If you’re thinking about getting started but worried about your lack of experience, this post looks at how to become a freelancer.

Meaning of Freelancing

The meaning of freelancing is earning a living by working for multiple clients. The main idea behind freelancing is to gain experience, grow your skills and make money. With freelancing, you can do it from anywhere in the world, and there are many ideas for freelance work. It’s easy to earn extra income without investing in an office space or infrastructure.

You don’t need formal education or qualifications to start freelancing. You need a PC or laptop and Internet access to start freelancing and earn money online. Furthermore, you can work as a freelancer from anywhere in the world. You should have good communication skills with clients, who could be anywhere in the world too!

Freelancing Ideas to Start Freelance With No Experience

Starting as a freelancer can be a daunting process. You’re not only taking on the role of a small business owner but also an employee, manager, and marketer. To make things easier, here are some tips for starting a freelancing business with no experience:

Do More Research

When you’re working for yourself, that means you’re responsible for everything. You might be the only one to know what you’re doing and how to do it well. And if you have no experience, then it’s going to be difficult for potential clients to trust that you can deliver results.

So, before taking the plunge into how to become freelance full-time or even part-time, make sure that you know what you’re doing. Read blogs and books on your chosen topic, attend workshops or training sessions, and get a mentor who can help guide you through the process. You’ll be glad that you did when your first client calls!

Make Sure You Have the Tools and Equipment You Need

A big part of running your own business is providing the services or products people want. Before you begin freelancing, make sure that you have everything you need. If you don’t have the tools or equipment required for your work, such as a computer or printer, consider renting them until you can afford to buy them yourself.

Pick Your Niche

It’s important to choose a niche for yourself as a freelancer. You’ll succeed more if you specialize in something specific rather than trying to do everything. For example, if you know how to write well but don’t know much about graphic design or web development, consider specializing in writing articles instead of doing all three tasks on every project. This will allow you to charge more per hour and attract clients who want writers rather than designers or developers.

If there’s something that you’re already good at and enjoy doing, then consider offering your services as a consultant or trainer in that area. If not, consider what skills and interests you have and how they could be applied towards helping others with their projects or goals.

Make a Website Or Portfolio to Show Off Your Work

Suppose you have any skills or talents like graphic design, writing, or coding. Then you should definitely take advantage of them when searching for freelance opportunities online. You need to create a website or portfolio that showcases your best work from the past few years in school or at previous jobs. Prospects will be able to see your work, thus giving you projects and helping get your name out there in the world of freelance work!

Find Projects

There are plenty of platforms where freelancers can find work. Some of the most popular include Upwork, Fiverr, and Freelancer.com. These sites connect employers with people who have the skills they need, so you can sign up to be available for hire or bid on projects that interest you. You might get an immediate response from someone who requires help with something, or you may have to wait weeks before anyone contacts you about a job that fits your skill set.

Ask for Referrals

Suppose you’ve worked with someone before in a non-freelance capacity in school or at a previous job. Ask them if they know anyone who needs help doing similar work to what you’ve already done for them before. This is especially helpful when starting freelance out because it’s easier to get clients who know who they’re hiring than it is to get clients who don’t know anything about your work history at all!

Types of Popular Freelance Jobs

The freelance writing world has grown exponentially in the past decade and is expected to continue growing. If you’re considering freelancing, it’s a great time to get started. The following are some of the most common types of freelance jobs, with no experience available:

  • Copywriting. Copywriters write content for websites, brochures, advertisements, and other marketing materials. This type of work usually requires previous experience in writing or editing, so if you’re new to freelancing, you may want to start with something else first.
  • User experience (UX) design. UX designers focus on making websites easy to use by conducting user research and creating wireframes (a visual representation of how a site will look). They also do some coding and front-end development work. As a UX designer at the $5 deposit casino in MindepCasinos, you’ll conduct user research, create wireframes and collaborate with the rest of the product team to make an engaging experience for our users.
  • Editing. Editors review documents and correct grammar, spelling, and punctuation mistakes before they go public. They also help writers improve their language skills by suggesting ways to make their writing more professional-looking and effective at communicating with readers or listeners.
  • Proofreading. Proofreaders are similar to editors but focus on catching typos rather than correcting grammar or style issues. If you’re interested in proofreading, consider taking a course on proofreading techniques before applying for jobs to become a freelancer.
  • Translation/transcription/localization services (TLC). Translators translate written material into another language, while transcriptionists provide audio recordings or video footage from one language into
  • Programming. Programmers can design software or websites, troubleshoot problems with existing programs, and develop new technologies that don’t yet exist.
  • Graphic design. Graphic designers create visual elements like logos, ads, brochures, and other marketing materials. They may also do some front-end development to design a website’s look and feel.

Conclusion

Wondering how to get into freelance work? You have to start somewhere, it doesn’t matter if you have no experience when you’re just getting started. With plenty of freelancer ideas

available, it’s time to give them a shot! Put effort into building your portfolio and promoting yourself online, and don’t be afraid to reach out to prospective clients. It may take a little longer to get hired as a freelancer, but word of mouth is essential for new designers. Project samples are worth as much as the word of mouth from happy clients. This is because it’s not just about you – it’s about the strength of your portfolio and the people that vouch for you.

Olympus4X Review: A Great Way Into the 21st Century’s Most Exciting Markets

0

Olympus4X is a fan favorite amongst modern online traders. It provides a highly professional and reliable space for FOREX trading, stock investing, cryptocurrency exchange, and more- all at a low cost and in an easily accessible package.

This review looks at how the platform achieves what it does and what tools it provides to support its users. It discusses the most important elements of the platform’s design and function to determine who can truly benefit from using the services.

First Glance

Olympus4X is all about making online trading simple and approachable. It favors a more basic system with streamlined displays and strategies rather than complex, potentially confusing tools.

Market Access

First things first: what can people actually do through Olympus4X? As a general broker service, the platform provides access to many markets, but the following three options are the most popular.

Cryptocurrency Trading

Olympus4X has an impressive crypto department- especially considering it is not a dedicated crypto platform. Popular selections include Bitcoin, Ethereum, and Litecoin- all of which can be exchanged on the platform and stored in external digital wallets.

FOREX

The Foreign Exchange Market is all about international currency and fluctuating values. Olympus4X offers more than a dozen pre-set pairings with all the trend information, data history, and live movement reports users to need to stay on top of things and make informed decisions.

Stocks and Shares

Investing in company stocks and shares is arguably the main attraction at Olympus4X- mainly because of the sheer variety of opportunities on offer. People love this part of the platform, and a lot of work has clearly gone into making it as professional as possible.

Useful Support Tools

Virtual Trading

Practice makes perfect, and in an industry as uncertain and ever-changing as online trading, the more practice a person can get, the better chance they have of success. Virtual trading is a perfect way to hone skills, test theories, and build confidence without taking any actual risks.

Trading comes with no guarantees, but careful planning, attention to detail, and dedicated study can certainly make it easier to find patterns and see the bigger picture. Olympus4X’s virtual platform is the ideal place to do that.

24/7 Customer Service

It helps to know that help is at hand if ever it is needed- even on a platform as reliable and efficient as Olympus4X. Customer service agents work around the clock to provide fast, friendly, and effective support to every user.

Real-Time Data Trackers

Live updates are essential in trading. Failure to keep up with the latest data can lead to ill-informed decisions and poor investment choices- something nobody wants to do! Olympus4X displays key market data in real-time reports that flow with the daily trends and movements- ensuring that all users have the accurate information they need at all times.

A Few Other Key Benefits

  • Low minimum deposit
  • No extra charges or fees for deposits or withdrawals
  • On-the-go access through a downloadable mobile app
  • Fast, easy, and secure account setup

Potential Improvements

  • The design is great, but a couple of minor details could use some more development.
  • Sometimes the platform is a little bit slow.

How Is Olympus4X Different?

A lot of the ways Olympus4X operates are similar to other leading platforms and brokers because there is a certain formula that works. What makes Olympus4X stand out as a more attractive choice for some people is the paired-back way it approaches these complicated features.

Some people love a complex platform and feel comfortable sifting through lots of data, but others don’t. Those who prefer a no-nonsense, minimalistic way of working are better off on a platform like this.

Conclusion: Who Should Choose Olympus4X?

In short, anyone who wants the opportunity to learn, grow, and hopefully excel in their digital trading journeys can benefit from this platform. It is understated, simple, and to the point, which is perfect for people who want to work without distraction and focus on building their skills.

The official Olympus4X website has all the details about how to sign up and what comes next, so take a look and get ready for a new investment adventure.

Disclaimer: This is sponsored marketing content.

Here’s How To Find The Right Restaurant Booths

0
rectangular beige wooden tables and chair

If you are renovating an old restaurant or are new to the world of restaurants, you must be going through a lot of stress, problems, confusion, and questions right now. Don’t worry, this is part of any restaurant renovation process, and your stresses will soon vanish once your bigger decisions are made and finalized. Meanwhile, we are here to help you today with what we are sure is one major stress of yours right now.

Yes, you guessed it right. Today, we are going to guide you on finding the right modern restaurant seating and making a worthy investment in it. If you are here, someone might have advised you to incorporate restaurant booths in your eatery. Well, that is a great piece of advice, for sure. But how can you find the best restaurant booths with no prior experience buying any?

Don’t worry; today, we will take you step-by-step through the process of finding excellent restaurant booths for your space. Take a deep breath, exhale, calm down, and start reading our guide. We are sure that by the time you reach this guide’s end, you’d be confident enough about your restaurant seating decisions and can easily find the most suitable one for yourself. So, let us get into this right away:

Do Some Research And Decide on A Booth Style

Yes, the first step to getting anything for your restaurant’s interior is to read about it, search for it on the internet, and go for a market survey if possible. Since restaurant booths are a bit contemporary and recent, chances are you don’t have enough information about how many styles are available and the pros and cons of each booth style.

Different booth styles also correspond to different layouts; you might need to see what your particular eatery space allows and what it doesn’t. The more you read about different booth styles and layout tips with booth seating, the easier it will get for you to decide on a particular style.

Also, do not get overwhelmed by the wide range of knowledge that you need to accumulate for this step. Do not rush through the decision either. This step will take your time, but once you are clear on a style you need, the later stages get pretty easy.

Do The Math

Even when you have picked a specific booth style, you cannot expect all such booths in that style to fit in your eatery. This is because all booths have different widths and heights, and you need to order a booth set in a size that corresponds to the eatery’s space.

So, in this step, you have to chalk out the seating arrangement on the restaurant’s floor and see how many booths and tables you would like inside. This helps you define a specific width and height for each booth, and then you can proceed confidently with your bulk order.

Decide On The Fabric

Next up, you need to decide on the upholstery that will give your booth seating its look. This is tricky because there are so many colors and fabric options to choose from. Some go for leather, while others prefer padded velvet. Some colors look good in one fabric while trashy in others. Plus, now restaurants have a theme and color palette to follow, and all of this adds more to this already complicated step of making a very impactful decision.

But we have a way to make it easier for you. You remember your market survey in the first step, when you are in it, you might as well take good notice of all the fabric and color options that look good to your eyes. This lets you easily take inspiration from others and make a quick decision with fewer risk factors. Whether it’s roof top restaurants in Nashville, New York, Miami, Paris, or London, you must do a lot of research on the fabric material of the furniture, as well as curtains. This is because it sets the positive vibe and ambiance.

The colors you choose must correspond to the overall interior of your restaurant and should also be good enough to last long. Do not be a miser here and always go for the highest quality upholstery to make sure that your booths can stand the test of time and last as long as they are meant to.

Find A Supplier

There will be so many people in the local furniture markets, claiming that they make the best restaurant booths. Do not fall into their trap. Rather, do your research and ask around for references of those who do this work the best.

No doubt, making a restaurant booth bench when you have the right measurements is not a hard task for anyone who knows their craft. But, you still need to find a professional who knows their job and is good enough to work with.

Ask them to visit your eatery for a final round of measurements, and then let them evaluate the things for any mistakes that you might have made. They can give you some valuable suggestions, too, based on their experience, and that is surely a great thing for any restaurant owner.

Wait And Clean The Place

Now, while your booths are in the manufacturing process, you need to show some patience. Here, the task is to wait while you make sure not to disturb the supplier as they do their job. Instead, you can ensure that the place where you need to fix the booths is neat and is cleaned properly every day. Work on other restaurant interior details, get the tables made and do whatever else is possible in that time. You can also arrange for the tables you will put next to the booths. You can also arrange cushions and any other details that you might want to add to the booths.

Soon, you will end up with fully functional restaurant booths, hosting your customers in all glory. All the best with your fresh interior and setup!

Wondering If You Can Change The Google Translate Voice To Male? Here Is The Answer

0

Google Translate has the power to provide you with a lot of things related to translations. Google Translate translates to various languages around the world. Aside from this, it also provides voice feedback, translates web pages, translates text messages, and so much more.

Suppose you are in the middle of your translation-related tasks, and you suddenly want to change the voice of Google Translate to male. Is this possible? Read along because we got the answer to your question.

Can You Change Google Translate’s Voice To Male?

Unfortunately, generally speaking, the answer is no for the users of Google Translate. You cannot change its gender voice. 

That means if your language in Google Translate carries a female voice by default, you will not be able to change it, such as to a male voice. The same applies when changing the default male voice in Google Translate to female. 

However, this we tackle more later on, some languages in Google Translate have male voices by default, such as Italian, and you cannot also change the male voice to a female voice. 

But Why? Why Doesn’t Google Translate Offer Changing The Gender Of Its Voice?

Google has not been very specific as to why it does not allow you to change the voice to either male or female. Still, if we are to guess, it is because the translator utilizes various program modules per language. 

Such modules are only recorded in one language by either a male or a female in a professional studio, and this recording takes several hours. Recording the same module in both a male and female voice is not only super time-consuming but also makes little sense for the financial aspect of it all, if you know what we mean. 

Therefore, sad to say, for those who want to try this option, Google Translate only offers translation in either male or female voice. 

But there might be a possibility. Keep on reading as we find ways should this become possible. 

Can Your Change The Accent In Google Translate?

According to the Google community, where users ask questions that other users can answer, you cannot change the way how the input text and translation are spoken, but you can change the settings within the Google Translate app. 

To do this, go to settings. Then to Voice (Region), and choose the Region. 

For instance, you can change or modify the accent for English in Australia, India, the United Kingdom, and the United States. 

Moreover, you can change the gender voice and accent-specific voices in Google Translate’s Android version on your phone’s OS and Google Assistant, which provides you with multiple accents to choose from. You can choose between male and female voices for any language as well.

Which Google Translate Languages Have A Male Voice By Default?

But if you really want to hear Google Translate as a male, you can just instead listen to certain languages that have the male voice by default and are available in male voices. These languages are Arabic, Bengali, Italian, Chinese, Danish, Dutch, and English (Australia). 

Want to find out which languages have a male voice in Google Translate? Follow these steps:

  1. Head over to translate.google.com. 
  2. Then, enter the text or phrase you want to translate.
  3. Afterward, click on the drop-down arrow in the right field and select the language you want your text to be translated. 
  4. On the box to the right of the screen that is the space for translated text, Google Translate will generate a translation automatically. 
  5. Now, click on the speaker icon to hear the translation spoken. 
  6. To listen to a different voice speaking in translation, you only have to change the language from the drop-down arrow and tap on the speaker icon again. 

This way, you can know which languages are spoken in which gender by default on Google Translate.

Yes, You Can Change Google Translate’s Voice On Your Android Phone

You read that right. So, despite the general answer that you cannot change the voice of Google Translate to male, or female, you can use your Android phone to change Google Translate’s voice. Surprised?

Below are the steps to follow. 

  1. Proceed to Settings. 
  2. Click on Language & input.
  3. Then, tap on Text-to-speech output.
  4. Lastly, click on the Settings icon next to “Google text-to-speech engine.” Easy-peasy, right?

Then, install voice data and select whether you want a male or female voice from the options given.

Relevant Frequently Asked Questions

1. Why Is It That Some Google Translate Language Text-To-Speech Is Still So Bad?

Different tasks machines or software perform are based on codes and algorithms by which they perform their tasks. It may happen that a machine can overpower or beat a human being at chess, but it yet cannot do the same with language.

The Google Translate text-to-speech or TTS is an engineering project. And for the engineers, even if the tool works with 50 percent accuracy, it is a success, and they keep enhancing this technology to raise the accuracy rate higher for specific languages. 

However, some bugs, deprecated functionality, and other issues still emerge, making some languages not as good to translate as others. 

2. How Accurate Is Google Translate?

Google Translate’s accuracy rate might not be 100 percent perfect for all languages, but this is increasing. Furthermore, engineers and technicians are working to develop this further so Google Translate can be more successful, useful, and handy. 

There is a 2019 study published in media outlets that found the results of Google Translate for Spanish were 90 percent accurate. However, for other languages like Korean, Tagalog, and Chinese, the accuracy rate was between 80 to 90 percent. 

However, at the same time, there was also a drop in the accuracy rate for languages like Armenian and Farsi, in which the accuracy rate was 57 percent and 67 percent, respectively. 

Therefore, it can be deduced that the accuracy depends on the language, too, apart from the algorithm and other mechanisms at play. 

3. Can You Change Siri’s Voice To Make Or Female On An Apple Device?

Siri is a virtual assistant part of Apple Inc.’s iOS, iPadOS, watchOS, macOS, tvOS, and audioOS operating systems. In other words, Siri is working on almost all Apple devices. Before, Siri had a default female voice, which, interestingly, the United Nations criticized and asked to stop making digital assistants female by default (think about Cortana, too), and program assistants to discourage abusive or sexist language.  

Siri now has both male and female voices with six various accents, such as American, Australian, British, Indian, Irish, or South American. 

Here are the steps if you want to change Siri’s voice or accent. 

  1. Head over to settings, then to Siri & Search. 
  2. Afterwards, tap on Siri Voice. 
  3. Select the accent you want.
  4. Finally, choose whether you want a female or male voice

It seems things about choosing male or female voices are more possible with Siri than with Google Translate. 

What Does MIP 67 Error Mean On Android? Plus, Here Is How To Fix It

0
woman wearing white dress shirt using holding black leather case on brown wooden table

The MIP 67 error pop-up can appear on Android mobiles and tablets of any brand, from LG to Motorola and many others. In this article, we will define MIP 67, explain why the error occurs, and enumerate the different methods on how you can fix it. It does not matter if you are using Boost Mobile, Sprint service, or any other cellular network. The steps for troubleshooting and fixing the issue are the same. 

What Is MIP 67 And The Reason Behind The Pop-Up Error

MIP 67 is a mobile mode authentication failed error that can pop up when your device fails to register with the Packet Data Serving Node (PDSN), a component of the carrier’s network. In other words, to put it simply, the MIP 67 error usually happens when your device is unable to access cellular services such as mobile data. 

This pop-up error can occur because of varied reasons, including incorrect provisioning. There are times the MIP 67 error pops up when activating a new device with your same old SIM card and phone number. It can also pop up if you have a SIM card installed with no service and your mobile data is turned on.

How Can You Fix The MIP 67 Error?

There are different methods when it comes to fixing the MIP 67 error. We have searched far and wide to find out these methods for you. If you are somebody facing this issue on a device you want to use with Wi-Fi only, you can put your device on airplane mode to avoid the MIP 67 pop-up and normally use wireless Internet connectivity. Here are the methods should you want to fix the issue. 

Method 1: Turn Off Mobile Data And Turn It On Again

Turning off your mobile data will certainly stop the pop-up since the device will not attempt to check for cellular services. The point here is to fix the error and issue, not just avoid the pop-up. Once you turn off your mobile data, please turn it on after a few seconds. If this method does not work, you can try removing and reinserting your SIM card. 

Method 2: Restart Your Device

At times, restarting your device can fix the issue, and it only takes a few seconds to restart your device, so make sure you try this method. Most devices can be restarted by simply holding and pressing the power button for a few seconds and then tapping on the restart button. Once your device turns on again, hopefully, you will be able to access all the cellular services again and not see the pop-up error anymore. 

Method 3: Change The Network Mode

Follow this procedure as you do this method. 

Go to Settings > Connection > Mobile networks > Network mode > select LTE/CDMA.

Once you complete the previous step, proceed to Settings > General > System Updates > Update Profile. 

If the wrong network mode were causing the issue, it would not pop up again (hopefully).

Method 4: Change The MSID (Mobile Station ID)

Using the wrong Mobile Station ID (MSID), also known as the Mobile Identification Number (MIN), can prevent your device from using its cellular services, which will eventually give rise to or trigger the MIP 67 authentication error. 

This method involves contacting the customer support of your service provider and asking them for your MSID. Once you get it, follow the steps here. 

  1. Open the dial app and dial ##847446#. Then, tap Edit. 
  2. Enter the MSID provided by the customer support team of your service provider. Then, tap OK.
  3. Your handset will reboot, and you shall stop seeing the MIP 67 pop-up. 

Method 5: Update Your Device’s Preferred Roaming List (PRL)

Preferred Roaming List (PRL) refers to the database stored on CDMA devices. It contains information used during the acquisition procedure. It is recommended that you occasionally update the PRL to receive excellent service. This method also works if you are dealing with the MIP 67 pop-up issue. 

Take note. Before following the steps we will enumerate up next, you must ensure your device is connected to Wi-Fi. Here are the steps. 

  1. Open Settings.
  2. Scroll down and tap Software update.
  3. Then, tap Update PRL. 
  4. Once these are done, tap OK. 

Or you may also follow these steps under this method. See below.

  1. Dial and call *228.
  2. Choose 2 to update your phone’s PRL.

After a couple of minutes, you should receive the confirmation message. 

What If Nothing Works? What Should You Do?

Of course, we do not want to reach that point when nothing works. But if you have tried all the above methods and none of them fixes the issue, you can follow these alternative steps. 

  1. Try dialing ##72786# with your phone. This will reboot your device and, in some cases, fix the MIP 67 error. 
  2. Call the customer support team of your service provider to check if they have the right ESN and SIM number. 
  3. As mentioned several times, MIP 67 occurs when your device fails to get mobile data. So, if your phone has a SIM card without any service plan, remove it. Additionally, you can also check for possible service outages in your area. 
  4. If still, nothing works, a factory data reset may do the job. Factory resetting your device will restore it to its original state by erasing or deleting all your stored data. This is why it is highly recommended that you back up your data before resetting your phone. Keep this in mind. 
  5. The last thing or alternative you can do is to use Wi-Fi. We understand this is not what most people want to do, but if none of the methods we outlined is working for you (which is very rare), you can remove the SIM card from your phone and connect to Wi-Fi. 

Conclusion

The MIP 67 error is the pop-up error you get when your device is unable to connect to the Internet with the use of mobile data. The significant reasons behind this error are improper APN settings, outdated system software, network uses, and an invalid MSID. Follow the methods you learned about above to diagnose and fix the MIP 67 error on your gadget. 

Mostbet UZ Kirish – First Step into the World of Betting

0

Sports betting is an excellent way to have a good time. After all, here you can relax, getting pleasant emotions from winning your favorite team and playing the bet. Moreover, a successful forecast implies a thorough analysis of a sporting event. But a comprehensive analysis begins earlier – when choosing a bookmaker. Because cooperation with a quality platform is the cornerstone of successful betting, it is crucial that the company offers good conditions and provides a high level of security.

It is not surprising that many Uzbek bettors prefer cooperation with the Mostbet bookmaker. Because this company has a wealth of experience and an excellent reputation that has been built up over 13 years. The bookmaker started working in 2009 by opening an office in Cyprus. The service’s first important step can be obtaining an international license from the Curacao gambling regulator. The presence of this license gives the right to officially work on the territory of many countries, including the countries of Central Asia. Well, it remains to go through the registration procedure, complete Mostbet UZ kirish, and learn more about the company’s capabilities.

The first pleasant surprise appears immediately after visiting the site. Because during the registration process, the Uzbek user can choose an excellent welcome bonus. For example, his first deposit will be increased by 125%. The maximum gift amount is 3,000,000 soums. It is worth saying that this bonus must be wagered within seven days from the date of receipt. The wagering requirements are simple – you must put down the gift amount five times. Only express bets of 3 or more events with a minimum odds of 1.4 are considered.

You can replenish your account using various payment systems. The bookmaker accepts transactions via UZCard, MasterCard, Visa, WebMoney, and the Binance exchange, as well as payments from Bitcoin, Bitcoin Cash, Zcash, Dash, Ripple, Ethereum, Tether, Dogecoin, and Litecoin cryptocurrency wallets. There are no commissions for replenishing the account, and the money is credited to the deposit within a few minutes. Also, remember that this is a legal casino operating according to local requirements. Therefore, payouts of winnings may be taxed. Moreover, the withdrawal option is blocked for unverified users. You must go through the identification procedure to unlock it.

Now the Uzbek bettor has the opportunity to make the first bet. On the main page of the company, in the central part, there is a list of upcoming events. The menu on the left allows you to select one of the relevant disciplines (football, hockey, basketball, tennis, volleyball, futsal, handball, ping-pong, martial arts, rugby, baseball, boxing, and water sports are available). Polo and others). Moreover, there is even an opportunity to choose a section with esports disciplines and bet on CS:GO, Dota2, LoL, Valorant, SC2, WoW, and other tournaments.

As for the list of events for popular matches, it can reach hundreds of options. Bets are available on the winner, a specific score of a match or half, total, statistical indicators, and other options. Moreover, everything becomes even more convenient thanks to a quality mobile application. The program is well optimized and works with all modern iOS and Android devices. Therefore, you can make a forecast in any convenient place where there is an Internet connection. Mostbet allows you to make your journey into the world of gambling as pleasant and efficient as possible.

Review of Mostbet for Azerbaijani User

0

Gambling can bring a lot of emotions – the delight of winning, the satisfaction of a quality forecast, the pleasure of the constant work of the brain. After all, it’s not enough to focus on luck – this is a road to nowhere. It is necessary to carefully monitor many factors, constantly analyze the situation, and adjust.

Moreover, one of the most important steps is taken at the beginning of this journey – a novice bettor must choose a high-quality and reliable partner. The bookmaker should become his excellent guide to the world of betting. Today in Azerbaijan, there are many different sites, and it will take a lot of time to analyze each of them. You can make a smart choice and become a client of the trusted Monsbet service.

The bookmaker started its journey back in 2009 and is planning to celebrate its 15th anniversary soon. The head office of the company is located in Nicosia, Cyprus, and the bookmaker itself has an official license from the gambling regulator Curacao. Mostbet has been present in the Azerbaijani market for many years and has managed to become one of the segment leaders here. Such success was made possible thanks to careful concern for the safety and convenience of users.

The official site has several language versions, which is very convenient. The user can choose the preferred option and avoid language barrier issues. It is also worth noting that the page has an adaptive design. This means that the location of the blocks changes depending on the screen resolution. And the user can play even through a mobile browser. In this case, all the functionality is preserved, so making a bet is easy and straightforward.

And for mobile betting fans, the company offers a high-quality and well-optimized mobile application that works with all modern iOS and Android devices. The download link is available on the official website. The program works without errors and provides a stable connection even with a weak signal.

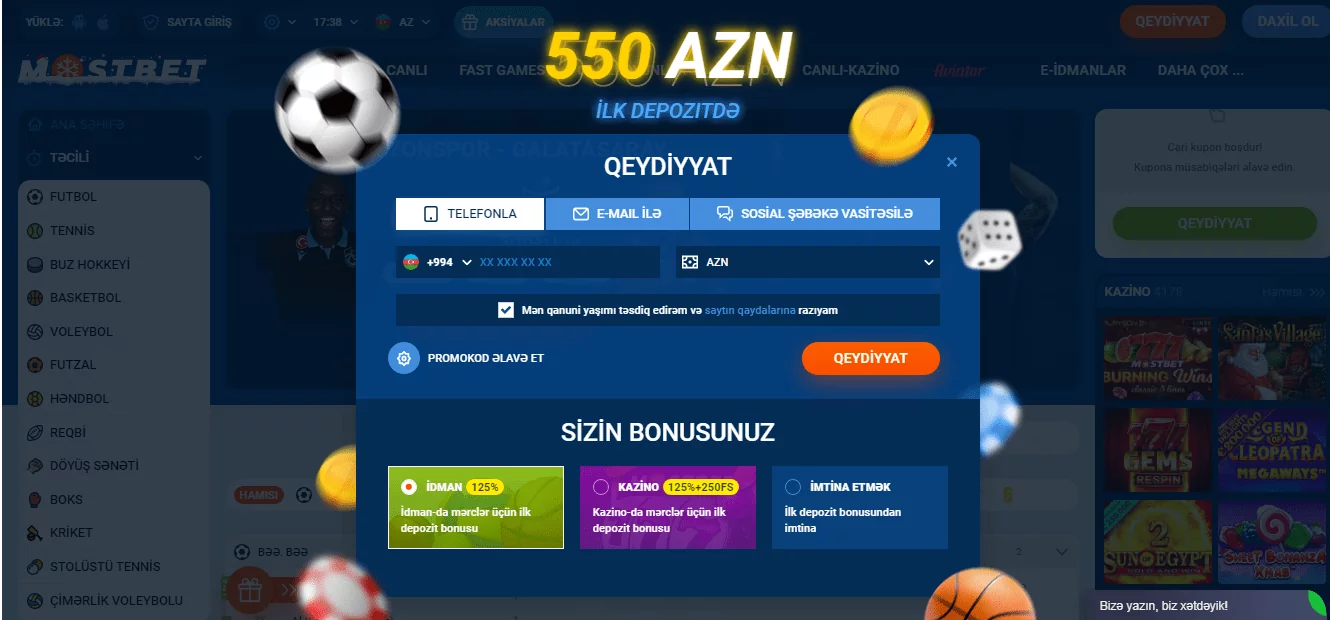
Now it’s time to talk about registering on the site. Mostbet offers customers four options: mobile phone, social media, email, or one click. Everything is simple and clear, so even an inexperienced user will not experience problems.

The next step is to replenish the deposit. Azerbaijani bettor has the opportunity to choose from the available options: MasterCard, Visa, SmartPay credit cards, eManat, WebMoney wallets, as well as through the Binance exchange. Moreover, the platform accepts payments from Bitcoin, Bitcoin Cash, Tether, Ethereum, Ripple, Litecoin, Dash, zCash, and Dogecoin cryptocurrency wallets.

What’s more, new customers can count on a welcome gift. The first deposit will be increased by 125%, and the maximum bonus amount is 550AZN. Of course, this bonus must be wagered. Azerbaijani bettor must scroll the amount of bets five times within seven days. Only bets on accumulators from three events with a minimum odds of 1.4 are considered.

But even so, the payout option will still be inactive because money withdrawal is available only to verified users. The bookmaker follows the international KYC/AML policy, which only pays out money to identified bettors. The Azerbaijani user must provide a copy of the passport and other documents to security officers and wait up to 72 hours. Only after that will transactions be possible on the same wallets from which the replenishment was carried out.

Recent Posts