Mercenaries mode will return in Resident Evil Village after its absence in Resident Evil 7. Capcom announced this during the Resident Evil Showcase. While the Mercenaries mode is not connected to the main plot, it uses the same characters and stages for arcade-style missions.
The first Mercenaries mode debuted in Resident Evil: Nemesis and was named after the story’s playable Umbrella mercenaries. The Mercenaries mode adds action to the Resident Evil games, with the goal is reaching various points in the game while shooting down any enemies that get in the way.
In story mode, though, the player must still preserve ammunition and healing items. Surprisingly, the Mercenaries mode was left out of the Resident Evil 3 sequel, despite the fact that Resident Evil Resistance was supposed to take its place.
At yesterday’s Resident Evil Showcase event, new specifics about the upcoming Resident Evil Village were announced, including information about the game’s upcoming new demo. According to the PlayStation channel, the Mercenaries mode is returning in Resident Evil Village (the unique segment was posted to the GameTrailers YouTube channel). The mode will not be unlocked until the player has completed the game, but once it has, the player will freely fire through armies of monsters.
All new features will be included in the Resident Evil Village edition of the Mercenaries mode. Between levels, the player will be able to visit the Duke and buy new weapons and improvements. In the game, the player will customize their loadout of weapons and pieces, allowing them to select the right choices for their playstyle.
During gameplay, players can also unlock abilities that boost their physical skills or enhance their weapons’ power. The Mercenaries mode is designed to put the player’s abilities to the test by pitting them against the game’s monsters in fast-paced fights.
There was speculation that the Mercenaries mode, which was absent in Resident Evil 7, would not appear in Resident Evil Village. Since the previous mainline title was based on the gameplay’s survival horror elements, it made sense to leave it out. The Mercenaries mode makes sense to return to Resident Evil Village, which takes action back to the game in a major way.
Yu-Gi-Oh cards, like those in most TCGs, are printed with a number of different cosmetic effects.
Foil titles, holofoil art, and cards with a refractive coating covering the entire card’s entire surface are all available. These results are commonly referred to as a card’s ‘rarity,’ with ‘higher’ rarities reserved for the more difficult-to-pull cards in each set. However, while a Common may be the most common card in a “core” or quarterly tentpole booster pack, an Ultra Rare might be the most common card in a non-core booster pack if it’s an all-foil update.
When buying or selling cards, keep two things in mind: you’ll need to know how rarities are allocated in a pack, and you’ll need to be able to recognize each rarity visually. The first aspect is simple: a fast scan of a card’s set identifier–those letters and numbers below the numbers on the right side of the card–will tell you which rarities are present in each release and how many are allocated per pack.
However, distinguishing rarities by sight can be difficult. We’ll go through the most popular rarities in the game, as well as a few extras you may find when evaluating a card or set.
Common
If you’ve ever played Yu-Gi-Oh!, you’ve probably come across a few different cards. These are the non-foil cards that make up most sets and will be the ones you draw from packs the most.
Popular cards come in various variations, including the notorious Short Prints and Super Short Prints, for which Konami has been chastised.
When a normal, or a card that is meant to be the easiest to pull from a deck, is harder to find in packs, it is known as a Short Print. As a “byproduct of the production process,” Kevin Tewart, Konami’s head of production for Yu-Gi-Oh! in the United States, reported that all Booster Packs contain Short Print cards.
Rare
Rare printings are the next step up from common cards, adding a holofoil to the lettering at the top of the stamp, mostly in silver, but black and gold have also been used. Several updates have been made to this particular rarity over the years, and they are no longer printed in core sets as of Eternity Code’s release in early 2020. However, they still play an important role in the game’s history.
Super Rare
In addition to eight Commons, every core booster pack is guaranteed to contain at least one Super Rare. Holofoil artwork, Level, and Attribute icons can all be seen on modern Super Rares. Just holofoil artwork can be seen on older Super Rares.
Ultra Rare
Ultra rare cards have a gold card name and a holofoil logo, making them the rarest of the usual rarities. The card’s Level/Rank and Attribute are also printed as holofoils on newer UR cards released after July 2017.
The majority of UR cards are among the most costly in their collections due to their rarity and the fact that Konami usually prints the best cards as SR or higher. They are also the rarest type of card in almost any Structure Deck.
Ultimate Rare
Ultimate rare cards incorporate an “embossed” foil to the card art, including the artworks’ borders, the Attribute symbol, and a monster’s level stars. They are widely regarded as one of the greatest rarities ever published in the series. While UR variants of certain cards are still considered more expensive than their UL equivalent, the card name is written gold, as it is on UR cards.
According to Konami, UL cards are unusual variations of R, SR, UR, or Secret Rare cards that have the same Fixed Number as their regular counterparts but are much harder to find. UL cards were removed from key releases with Breakers of Shadow, despite their success, and are still only included in tournament packs.
Secret Rare
Secret uncommon cards used to be the most valuable in the series, and they were marked by a holographic rainbow card name and a special holofoil known as parallel holofoil on the artwork. They’re also the standard rarity of Collector Tins and other limited edition sets with promotional cards.
Due to players using electronic scales to locate packs of SE cards inside, SE cards were discontinued the introduction of Soul of the Duelist in 2004. They were reintroduced three years later in Strike of Neos.
There’s also a rarity known as “ultra secret rare” by the group, which happens anytime a card has UR foil on the art and has the sparkly silver foil name of a SE card.
Only the Yu-Gi-Oh! GX Special Edition version of Elemental Hero Wildheart has been published in the TCG with this rarity. In 2004, some Collectible Tins had promo cards that were misprinted as super secret rare.
A “secret ultra rare,” in the same vein, is a card with SE foiling over the illustration and the gold letter foiling of a UR card. Misprinted SE variants of Gaia the Dragon Champion and Tri-Horned Dragon from Legend of Blue Eyes White Dragon, as well as Jinzo from Pharaoh’s Servant, are the only known cards for this kind of rarity.
Prismatic Secret Rare
A prismatic secret uncommon, unlike secret super rare and ultra secret rare, is an official card rarity that is a special variety of SE cards and uses a holographic foil pattern that follows a distinct horizontal and vertical parallel pattern rather than the normal diagonal pattern. The card name often has several speckled holofoil shades rather than a single solid hue.
The name is only found in the TCG and is only used in key collections, although in the OCG, it is the standard SE rarity. TCG video game promos were prismatic secret rare initially, but it now appears in exclusive collections, including the 2020 Tin of Lost Memories.
Collector’s Rare
The chase exclusive Collector’s Rare rarity first appeared in Toon Chaos in 2020, and it appears like a more subdued version of a Platinum Double Rare. These cards have a rainbow-colored pattern on the rim, picture, Level/Rank, and Attribute, as well as a Secret Rare-style name.
Close to an Ultimate Rare, Collector’s Rare cards have a gently elevated texture and an etched look. The foil texture on these cards isn’t always bent in the same direction, giving the Collector’s Rare pattern a distinct look that many people equate to fingerprints.
Ghost Rare
Ghost uncommon cards were first included in 2007’s Tactical Evolution collection and are among the game’s rarest cards, with most sets including them only having one card in the rarity. The card name is written in gleaming silver lettering, and some colors have been stripped from the card graphic, giving it a pale, “ghost-like” look.
With Breakers of Shadow, another GR card was omitted from the core set rotation, but The Winged Dragon of Ra was reprinted as a GR in Legendary Duelists: Rage of Ra last year. There are only 35 ghost rare TCG cards available right now, not including ghost/gold rares.
Parallel Rare
Parallel Rares are the same as non-parallel Rares, but they have a covering on the back. Depending on the form of unusual, this coating can have a different design. They are otherwise similar to other rares of the same kind in appearance.
Duel Terminal, Battle Pack 2: War of the Giants, and Star Packs are all sets that contain these cards. A dotted, shatterfoil, mosaic, or other special pattern is usually added to the whole card in the form of a non-foil film bonded to the top layer of the card for Parallel Common, Rare, Super Rare, Ultra Rare, and Secret Rare cards. The designs can adjust with each publication, but the card rarity remains consistent.
Duel Terminal
Most players consider the duel terminal to be part of the parallel rarity, but it is distinguished by the fact that it often serves as its own set of cards. They are based on parallel commons, but they have a different coating style.
Duel terminal version cards can be used for DT machines, which are standard arcade machines with different game modes and the ability for players to check in their cards to use. DT cards are only usable in licensed competitions if they are not used in a more commonly available package or commodity.
Gold Rare
This rarity, known simply as gold, is limited to a collection of special sets known as the Gold Series. Only cards with gold foil over the card name, holographic gold foil artwork, artwork frame, text border, and card border are included in these packs.
Gold rarity cards have undergone many style updates over the years, but they remain unique to their own packs. There’s also a ghost/gold rarity, which replaces the gold-foiled artwork with hologram-like artwork from a ghost rare card.
The Game of Thrones dragons are undeniably essential to the show’s conclusion now the Game of Thrones is over. Many predicted this would happen as early as 1996 when George R. R. Martin’s now-iconic A Song of Ice and Fire books were released; however, few series forerunners accurately predicted Daenerys Targaryen’s flame-breathing heirs would unleash ice as well as fire.
You’ll also learn what some of the trio’s enigmatic, magical names mean, both of which have a Targaryen connection; what happened to the fire-breathing triple-ancestors threat’s long before the show’s plot began; and how you can own Viserion, Rhaegal, and/or Drogon without having to fight Dany. And, let’s face it, you’d have a slim risk of succeeding.
This is what you need to hear about the hottest, toothiest, pyromaniac brothers from Game of Thrones…
Original Three Dragons
These were the dragons that lived after House Targaryen’s invasion of Westeros.
Balerion
Balerion is number one. Balerion, the Black Dread, is the world’s largest and most powerful dragon, named for an ancient Valyrian deity. His first rider was Aegon I, accompanied by Maegor, Aerea, and Viserys I Targaryen. He died as a result of old age.
Meraxes
Queen Rhaenys rode this dragon, which was also named after an ancient Valyrian god. During the First Dornish War, both the rider and the dragon were destroyed.
Vhagar
During the Dance of the Dragons, Vhagar, the youngest of the three original dragons, was killed. Queen Visenya was the first to ride her, accompanied by Baelon Targaryen, Laena Velaryon, and Aemond Targaryen.
The New Dragons
On her Dothraki lord, Khal Drogo, Queen Daenerys Targaryen hatched her dragon eggs on the funeral pyre of her Dothraki lord. The ‘Game of Thrones dragons are called Drogon, Rhaegal, and Viserion.
Drogon
Drogon is the biggest of Daenerys’ dragons, with red and black coloring. He is named after Khal Drogo. Drogon, the giant dragon that Daenerys rides into combat, has many flesh wounds, including one from Qyburn’s scorpion.
Drogon is Dany’s most dangerous dragon, terrorizing the nearby countryside on a regular basis. He also serves as Daenerys’ executioner, burning any who fail to bend the knee, such as Samwell Tarly’s father Randyll and younger brother Dickon.
Rhaegal
Rhaegal, Daenerys’ dragon, is named after Rhaegar Targaryen, Daenerys’ oldest brother, and Aegon Targaryen’s father (who we know better as Jon Snow). His scales are bronze and gray. Rhaegal may not have a rider (yet), but he regularly travels with Daenerys, including to the Dragonpit, where Cersei correctly deduced that one of Dany’s dragons had died.
Viserion
Viserys—he of the golden crown—was Daenerys’ deceased brother and was light brown in color when the Night King killed him in the Game of Thrones Season 7 episode “Beyond the Wall.” The Night King revived Viserion as a wight—an ice dragon—after the army of the dead dragged his corpse from a frozen lake. Viserion, riding on the back of the Night King, melted the Wall, allowing the White Walkers to invade Westeros for the first time.
Other Dragons
While other older dragons in ‘Game of Thrones’ have been listed, Gorge R.R. Martin’s ‘A Song of Ice and Fire’ series has more information about them.
Arrax: Prince Lucerys Velaryon of Driftmark’s personal mount. During the Dance of the Dragons, Vhagar killed both of them.
Cannibal: This wild dragon was never ridden and ate the carcasses and eggs of other dragons.
Caraxes: The Blood Wyrm The red dragon of Daemon and Aemon Targaryen who killed and was killed by Vhagar.
Dreamfyre: Rhaena and Helaena Targaryens ride, a she-dragon.
GreyGhost: Another wild and untamed dragon killed by Sunfyre.
Meleys The Red Queen: Princess Rhaenys and Alyssa Targaryen’s personal mount that was killed during the Dance of the Dragons
Moondancer: Baela Targaryen’s she-dragon died at the age of thirteen.
Morghul: An enraged mob killed this dragon, who was tethered to Princess Jaehaera.
Morning: During the Dance of the Dragons, Lady Rhaena Targaryen’s dragon was born.
Quicksilver: King Aenys I and later his uncle, Prince Aegon Targaryen, rode this pale white dragon with pale white fireballs.
Seasmoke: Laenor Velaryon’s dragon, who later bonded with Addam Velaryon.
Sheepstealer: A wild dragon from Dragonstone who Nettles, a bastard girl, tamed.
Shrykos: The dragon of the young prince, Jaehaerys Targaryen
Silverwing: The she-dragon of Queen Alysanne Targaryen was later mounted by a bastard boy called Ulf.
Stormcloud: Aegon the Younger only rode this young dragon once until it disappeared.
Sunfyre the Golden: In the war against Moondancer, King Aegon II Targaryen’s glorious dragon died of wounds.
Syrax: Rhaenyra Targaryen’s she-dragon was named after an ancient Valyrian deity.
Tessarion The Blue Queen: Daeron Targaryen’s personal mount was a stunning blue she-dragon.
Terrax: The mythical dragon of Valyrian adventurer Jaenara Belaerys, who spent three years searching Sothoryos’ continent.
Tyraxes: The young dragon of Prince Joffrey Velaryon that was killed in battle.
Urrax: A Westeros legendary dragon said to have been defeated by Serwyn of the Mirror Shield.
Vermax: The dragon of Prince Jacaerys Velaryon met the same fate as his brother, Prince Joffrey Velaryon.
Vermithor: Hugh the Hammer later bonded with King Jaehaerys I Targaryen’s formidable dragon, The Bronze Fury.
When did the Game of Thrones dragons make their first appearance in the show?
Following the death of Daenerys’ husband Khal Drogo at the end of Season 1, the Game of Thrones dragons first appeared.
Dany was offered three eggs by Illyrio Mopatis earlier in the season to celebrate her marriage to Drogo. She kept these eggs in her possession at all times, finally throwing them on Drogo’s funeral pyre after he died.
Dany stepped into the blazing inferno, devoid of hope after losing her baby and having to put an end to Drogo’s fate, leaving Ser Jorah Mormont to believe she was dead. Instead, she awoke the next morning with three baby dragons clinging to her in the wastelands beyond Lhazar.
Short History of Game of Throne Dragons
Although Rhaegal, Viserion, and Drogon are thought to be the only living dragons in the Game of Thrones universe, they are part of a long line of notable dragons dating back to Balerion the Black Dread and covering the history of Westeros and the events leading up to Game of Thrones.
Aegon Targaryen and his sister-wives Rhaenys and Visenya conquered Westeros about 300 years before the War of the Five Kings from their fortress on Dragonstone (later ruled by the Baratheons and Daenerys), where they had lived after the volcanic ruin of their ancestral home in Valyria.
Except for Dorne, the Targaryens invaded all seven kingdoms while riding three dragons: Balerion, Meraxes, and Vhagar. Aegon used Balerion to burn the huge castle Harrenhal, which is now a half-melted ruin in Game of Thrones, in one of the most dramatic plays of the War of Conquest. Balerion’s fire also forged the Iron Throne.
Balerion, Meraxes, and Vhagar were thought to be the last living Valyrian dragons, though dragons can be found in Essos’ cultures. In Westeros, legends of ice dragons, sea dragons, and wyverns abound. Both subsequent dragons born in Westeros, on the other hand, are descendants of the three Targaryen dragons who conquered the continent.
Balerion and Vhagar lived for decades and fought in the Targaryen wars after Aegon’s failed attempt to conquer Dorne (Meraxes was killed after Aegon’s failed attempt to conquer Dorne). Balerion’s offspring, who mated with Vhagar and Meraxes, were mostly limited to the Dragonpit in King’s Landing.
None of Balerion’s offspring, who mated with Vhagar and Meraxes, ever grew to his age. While the Targaryen dynasty’s dragon legacy ended 150 years ago, 19 dragon skulls were displayed in the Red Keep’s throne room before Robert’s Rebellion overthrew the Mad King, Aeyrs II Targaryen.
The last descendant of Balerion the Black Dread, according to Tywin Lannister’s grandson Joffrey, had a head “the size of an apple.”
Family support services are basically a community working to assist people coming from underprivileged or unfortunate backgrounds. They address various issues of the community they’re working for and try to help them lead a better life in general.
African Americans have been subject to racism and ignorance for a very long time. They continue to live in situations that are anything but reasonable. The black community has been suffering since forever and now, the level of frustration in African Americans has crossed the threshold and they’ve started to get aggressive and violent – primarily because they aren’t getting the help and support that they so badly need right now. This is where family services step into the picture.
Let’s have a look at several factors which prove that family services are essential in order to prevent violence in African Americans.
How Can Family Services Reduce Violence?
Family-Based Social Networks
Violence is often a result of aggressive behavior that can be caused due to being reserved and restricted in a particular social circle. Through family services, people are encouraged to increase and expand their social networks and peer interaction which helps them in digging out and shaping their attributes towards non-violence. Social networks play a vital role in the radicalization of violence amongst African American people. A positive social network can help them reinforce some norms that are non-violent, which would enable people to leave all those habits or behaviors which go against them. It influences their choices and how they react to things happening in their lives, and how important it is to deal with them calmly and wisely. Therefore, the foremost principle through which family services reduce and prevent violence in African Americans is by building social links and connections.
Urge To Support The Victims
Women are more likely to be the victims of violence. By urging people to support and empower women within the African American social networks and families, it can be assured that the violence would be reduced. By judging the vulnerability of how one is willing to promote violence, the contraction becomes way easier.
Capitalize The Role Of The Family
Family is the pull factor when it comes to the prevention or reduction of violence. Family services can play an extremely important role. Measures are taken to apply violence-reducing pointers. An increase in commitment with family would disengage the person in the whole violence process, as he or she would end up thinking about their families and how it may influence them. Those who lack family ties are more likely to get caught in violence-promoting activities. Therefore, for those who do not have family ties, family services help them to build up connections which results in rehab in their lives and allows the African American to rejuvenate.
Family Building Awareness
Through family services, everyone in the family is encouraged to understand the need for violence reduction and how they play a vital role in it. Violence may be a result of any issue, whether someone is judged or blamed for something which he or she hasn’t done or someone who is losing his or her job because of someone else. The head of the families is encouraged to talk with the suffering individual through it, which again works as rehab for them and results in a positive way. In this way, people tend to share their frustrations verbally, and the chances of any issues being exacerbated are reduced and a positive and peaceful community is attained.
In past years, family services similar to the AAFS have played a vital role in reducing and preventing violence in African American people. They, being the victim of a lot of discrimination, end up being violent, which affects them but with family services, the issues which were left unaddressed are now being addressed the way they should be. We can’t deny the fact that family services have helped reduce the incidents of violence among the African American community.
Enchanted swords are the most powerful weapons available in Minecraft. When it comes to survival in any Minecraft environment, they are a must-have in any serious player’s first inventory slot.
More enchantments are applied to the game as time goes by to refer to the player’s swords. They’re becoming much more strong as a result of this. In every Minecraft setting, here are the top five enchantments that players should have on their shield. In any PvP war or mob ambush, these enchantments would guarantee success.
How To Enchant A Sword
You’ll need an Enchanting Table to begin enchanting your blade. This is a mid-game item that costs 2 Diamonds and 5 Obsidian to create. If you do have a Diamond Pickaxe, you’ll need 5 Diamonds. Surround the Enchanting Table with 15 Bookcases until it’s been made, and you’ll be able to use the top-level enchantments.
If you have some Enchanted Books, you can use them within an Anvil with your Sword. Combine the two, and you’ll have the choice to rename your Sword here. Such enchantments can’t be used together.
Knockback
For those who want to put some space between themselves and their opponents, the Knockback spell is extremely useful.
Probably the least favorite in the Minecraft community, Knockback is a sword enchantment that puts a bit of extra knockback force with each hit. Normally, your sword will deal with a small amount of push force (plus the base damage) that will knock back your enemies for around 2-3 blocks. But with Knockback enchantment, you can send them flying around 6-7 blocks away from you.
It’s an effective crowd control enchantment if you’re in a tight spot, especially on Hardcore mode, where it is the most useful. But for Survival, you don’t really need it since your goal is to kill enemies, not to push them away.
Combine Knockback with a bow to easily dispatch your opponents before reaching you or sending them spiraling into the void below.
Bane of Arthropods
Swords enchanted with the Bane of Arthropods enchantment can be used to destroy the game’s “arthropods” hordes. Bane of Arthropods, or BoA, is a traditional enchantment for swords that can also be added to axes with the use of an anvil. The Bane of Arthropods concerns all creatures considered as having an exoskeleton by scientists.
Spiders, cave spiders, silverfish, Bees, and Endermites are all affected in the game. The harm done to these enemies is increased by the Bane of Arthropods. For every hit, the impact adds 2.5 extra damage per stage. The arthropod will be dealt 1-1.5 seconds of Slowness IV at level one; the cap is raised by 0.5 seconds per level of BoA. (up to 3.5 seconds). It has a maximum power ratio of V. Bane of Arthropods cannot be combined with Sharpness or Smite.
You can destroy the spawning monsters more easily if you have an XP farm with cave spiders or spider spawners. Silverfish produces in the strongholds, while Endermites are normally located on The End.
Sweeping Edge
Sweeping Edge III is a fantastic Minecraft enchantment for players who find themselves surrounded by angry mobs on a regular basis. This is a must-have magic for unfortunate or clumsy players’ blades since it significantly extends the length of every weapon. More damage may be due to nearby mobs as a result of this.
Once a player has been cornered, an enchantment like this is needed. It does the most harm and injures the most mobs. This encourages players to either make their way out or fight their way to victory.
Fire Aspect
Fire Aspect imbues the blade with red hot flames, as the name implies. This spell sets the target ablaze for up to four seconds, inflicting burning damage on all enemies who come into contact with it.
While the bulk of Minecraft mobs are vulnerable to Fire Aspect’s flaming slashes, a handful are resistant. Since Nether exclusive mobs are inherently fire immune, it’s better to stop utilizing this enchantment while slaying them.
In addition, enemies killed with the Fire Aspect sword lose cooked meat, making it an ideal meal preparation tool.
Curse of Vanishing
It’s cursed, as you’ve read in the name of the enchantment. With the Curse of Vanishing, you will forge your sword in tragedy and have it vanish before you die. This enchantment has no effect on the total attack damage of your shield, nor does it improve the toughness of your blade. It does, though, give you a sense of realism in knowing that if you die, your weapon dies with you, regardless of how strong it is. Unless you’re roleplaying, it is highly recommended that you don’t use it.
The Curse of Vanishing is an enchantment that causes an object to vanish when the player controls it dies in the game. After death, items with this spell will absolutely disappear rather than being dropped. Although this enchantment isn’t useful in Survival, it’s useful if you’re on a PvP server because it prevents enemies from stealing your items.
Unbreaking
Unbreaking III is a popular Minecraft enchant on almost any player’s weapon, as it improves the sword’s endurance tenfold. It’s a good idea and try and get Unbreaking on a tool when players have worked hard to have enough of the enchantments on their possessions. It will help the player hold the object for as long as possible.
The sword in Unbreaking III is destined to outlast the player. This enchantment comes highly recommended, particularly because it’s easy to come by on enchantment tables.
Looting
If you’re trying to farm particular mobs or want to be rewarded with more supplies for your valiant efforts, the Looting enchantment may help. This spell will even boost the drop rate of rarer monster ingredients, which will make it much cooler.
Looting III is a top-tier choice for treasure hunters and those looking to increase the game’s RNG. Not only can it improve the odds of obtaining decent loot from mobs, however, it often helps the player to gain a significant increase in the amount of loot that can be obtained from utilizing this enchantment on a regular basis, though not on a consistent basis.
You’re trying to kill a cow for its raw meat and leather, for example, which they normally drop at around 1-3 and 0-2. You should expect between 2-4 and 1-3 fall from Looting III, which is a decent number. If you want to speed up your monster hunting, use the Looting Enchantment.
Smite
Do you want to take on the Wither? You will want to use a Smite-enchanted sword. Smite improves the damage dealt with undead mobs, including skeletons and zombies.
Smite V is a game similar to Bane of Arthropods, but it focuses on zombie monsters. In comparison to BoA, this is fairly effective much of the time because the undead-type has the most variety of mobs in the game. The following are examples of undead creatures:
Skeletons
Zombie
Zombie Villager
Giant
The Wither
Any strike from the smite impact does an additional 2.5 damage per stage. It will have a power ratio of up to V, causing an undead mob to take up to 12.5 additional damage on a non-critical strike.
If you have skeletons and zombie XP farms, this enchantment is also useful. Sharpness is a better enchantment for multipurpose blades (swords that can effectively destroy other mobs besides zombie mobs).
Note that the Bane of Arthropods and Sharpness V do not stack with Smite V. You must pick one of the three swords to hold in your possession.
Mending
When it comes to almost any Minecraft instrument, sword, or piece of armor, mending is a must. It leaves a player’s possessions gleaming and fresh as long as he or she is earning XP. This enchantment is far more potent than any unbreakable enchantment because it effectively immortalizes any player’s gear.
All the player has to do to make the mending enchantment work is collect experience by any means available in the game. XP can be earned by participating in a variety of game events. Killing crowds, smelting ores, frying foods, breeding mobs, and trading with peasants are all options.
The one drawback to the Minecraft mending enchantment is that it is very difficult to get since enchanted books can only obtain it. These books can be obtained by bartering with villagers who work at a lectern. Many players use boats to carry villagers to their homes or bases.
Sharpness
Sharpness is similar to the magic Bane of Arthropods in that it increases the harm of your blade. Sharpness V is regarded as one of the strongest enchantments in the game, as well as a jack-of-all-trades in terms of damage production, capable of dealing with any kind of mob.
Sharpness V basically increases the sword’s outgoing damage by 3 attack damage. With each rise in enchantment level, the blade becomes sharper, deadlier, and even more destructive. Smite V (extremely powerful against Undead-type enemies) and Bane of Arthropods are two stronger enchantments for various types of enemies (very good against bugs). This is what you’ll wear if you really plan to go on a spree.
When combined with the game’s most powerful swords and axes, this spell can be leveled up to five times, making it completely devastating.
There are several weapons to be found in Fallout 76’s West Virginia wildlands, but we’ve compiled a list of the best. Others must be prayed for during a Nuke raid. Others can be built and discovered early in the campaign, while others must be prayed for during a Nuke raid. Although the RPG features of Fallout 76 can significantly impact the viability of some weapons, rare versions (identified by a special name, a star, and the inability to scrap them at the workshop table) can give players a significant advantage early on, with some being so decent that they’re actually worth keeping around in the (limited) C.A.M.P. Stash.
After an exhaustive series of beta sessions, Fallout 76 was released in November, bringing a strange departure from the franchise for an action RPG with no NPCs. Since then, negative reviews of Fallout 76’s alleged lack of emphasis, along with the game’s high price (along with microtransactions), have stung sales scores and received a lot of customer remorse. It’s been around a month since the game was out, and while it still has its devoted fans, something is disappointing about its success and continued appearance in the news.
Despite the absence of dialogue trees, Fallout 76 offers plenty of gameplay hours and a heavy focus on war. Most guns in the game have a balancing trade-off — high damage at the expense of high ammunition use, precision, and range at the expense of long reload times, and so on — however, others provide more bang for your buck. Screen Rant has compiled a list of the best popular and exotic weapons in Fallout 76, as well as several strategies for obtaining them (or at least increasing your chances), so keep reading to see what’s worth your inventory room.
Combat Shotgun
When you’re outmanned and need to unleash some serious firepower, the Combat Shotgun is your best bet. With a large number of enemies to farm this weapon from, high base damage, and a large ammunition capacity (starting at eight), you’d be foolish not to have it in your arsenal.
Increase the shotgun’s Damage Output with the reinforced receiver, and add a perforating magazine to maximize armor penetration with a perforating magazine. When combined with the shotgunner bonus, you’ve got yourself a harm machine; remember to stock up on bullets!
Hand Made Rifle
Without a doubt, one of the most valuable non-legendary firearms in the series. This will take on even the hardest bosses if you give it the best bonuses and modifiers. All you have to do now is wait for one to drop with your requirements’ appropriate combination.
This is better said than done in most situations, but if you play long enough, you might find the right one. Try to farm the appropriate tasks and destroy enemies with a high drop rate for this weapon.
Sledgehammer
Even early in Fallout 76, there’s still a crowd clogging up some relay towers on the map, and Eastern Correctional is another solid early-game haunt. This comparatively simple two-handed pistol does not sound overpowered but bear in mind the amount of Super Mutants all over Appalachia.
Most of them lose boards and other low-tier melee garbage. Still, you’ll sometimes come across a Skirmisher version who drops a sledgehammer, and the big arc of these powerful arms allows them ideal for taking down tougher low-level mobs without wasting ammunition.
Sledgehammers aren’t made until later in Fallout 76 (at least level 30), so you can apply mods to them at a weapons bench to turn them into a reliable one-hitter. The most noticeable drawbacks are their heavy weight and sluggish wind-up. Still, for a free common arm that’s in pretty plentiful supply throughout starter areas, it’s a smart idea to have around, as well as a stress-free disposable tool when your inventory’s clogged up. Non-melee builds will also benefit from these, and that’s long before they face the Super Sledge.
Assault Rifle
The backbone of any wastelander’s arsenal should be assault rifles. This weapon can engage enemies from a long distance and provide continuous fire towards them before they hit you.
The player has many options in terms of plugins and loadouts, which gives them a lot of flexibility. Installing the extreme receiver mod to increase damage and vital hits, for example, will convert the assault weapon into a DMR (Designated Marksman Rifle). If that’s not your thing, consider setting up an automatic receiver to fire lead at enemies instead.
The firearm also has a variety of optics to aid in target acquisition and range. It’s a great tool to have early to mid-game because it drops from many enemies and has perks that fit both auto and semi-auto gunplay (rifleman and commando).
Gatling Gun
This weapon is a colossal monster. It can spit bullets directly into whoever it is facing with a turn of the crank. Even if it’s just a mid-range pistol, anything captured inside that range is doomed. Supply dumps, crates, and mid-game enemies are the most popular places to encounter it. However, if you happen to find yourself in the Watoga Shopping Plaza, you can purchase it there.
Combat Knife
Even if you’re not optimizing melee in your build, combat knives are highly functional, light, and rarely a poor backup tool to hold in a quickslot. Plus, if you happen to come across a fighting knife with the Legendary Vampiric influence, you get the bonus of lifesteal, which can make those high-level encounters a breeze.
Legendary knives can be found in nuked areas or prime loot caches, and the Vampiric modifier can be found on a variety of weapons. Still, it’s particularly effective when combined with the knife’s ludicrous pace.
Any Fallout 76 players say that stabbing the air with this modded knife causes a tiny amount of healing to happen on its own, although this is likely to be fixed in upcoming updates. Combat knives can be seen all over the world map in Fallout 76, and they can also be conveniently made at a gun bench, with quality levels varying from 1 to 50.
Hunting Rifle
Nothing beats holding your breath while watching your target and gently pressing the button to dispatch your prey. With high damage and range, the Hunting Rifle rewards those with patience and a steady hand. It’s a common weapon around the wasteland, and with the right mods and bonuses, it’s the ideal weapon for engaging enemies from afar.
Modifying the receiver, barrel, stock, and finally, the optics will give the player a weapon capable of one-shot kills or, at the very least, severely crippling opponents. When combined with the rifleman and Covert Operative Perks, the Damage Output and the sneak multiplier can quickly take down objectives.
Gauss Rifle
This is a high-powered energy device that can annihilate whatever foe it comes into contact with. It hurls materials at enemies at such a high rate that they can’t avoid collapsing. It can be purchased, but it can also be obtained from high-level opponents. When you’re nearing the end of the game, keep an eye out for it.
The easiest way to improve this weapon is to boost its strength and add a sneak attack bonus. It’s a smart idea to use perks that increase harm, improve accuracy, and generally improve the rifles you have in your hands. Last but not least, the ammunition for this weapon is simple to make. You don’t need to do something silly; what you need is simple ammunition, readily available.
M2 Browning
Fallout 76 Perks, including Bear Arms, Lock and Load, and Heavy Gunner, can easily transform the M2 Browning from a hefty inventory drag to a lightweight DPS rig prioritized by character builds that aim for heavy weapon use.
Aside from that, the M2 is remarkably easy to locate, but it can necessitate some mild server hopping. Players searching for the gun in Fallout 76 could travel to Clarksburg and begin their hunt on the lake’s southern shore.
Suppose you’re at the Clarksburg Shooting Range, head southeast on the road until you reach a blown-out pickup truck. The M2 would be mounted on the truck’s flatbed, facing downhill, like a turret. If it’s not available in your server case, it’s simply because it was claimed by someone else shortly after it spawned — go to the main menu and look for a new world, and you should be able to claim an M2 Browning of your own.
Black Diamond
Black Diamond is one of Fallout 76’s stranger guns, and it’ll stay with you for a long time. This melee weapon is a modified ski with angry-looking teeth welded on. It’s a fast and heavy-hitting machine with the added advantage of +1 power to your stats.
This cool weapon can be obtained by completing this fairly basic questline, as detailed here, courtesy of News Week. It is better to purchase this weapon when you are Level 50, much like the perfect storm SMG, to guarantee that the weapon is awarded at that level.
Since it is a melee tool, it is recommended that you combine it with the Martial Artist Perk to increase Swing and the Gladiator Perk to increase Damage Output to slash through the enemy after you have modified it.
Fat Man
It’s difficult to write about guns in Fallout 76 without mentioning the Fat Man in the Bed. The Fat Man, who has become synonymous with the Fallout franchise, is predictably strong in the new game, but overburdened players can easily notice the whopping 20-pound weight, with 6 lbs required per mini-nuke.
For those unfamiliar with Fallout, the Fat Man is a handheld nuke launcher, boss-killer, and long-range crowd destroyer that wreaks havoc on enemies with its mini-nuke payload and does 450 base ballistic damage in a 14-foot radius.
Aside from the Fat Man’s raw disruptive power, there’s also the Daisycutter, an alien MIRV launcher version. The Daisycutter is technically weaker than the normal Fat Man, but its damage radius is theoretically larger. It transforms a single mini-nuke into six discrete missiles that disperse in mid-air (and it weighs 90 percent less without Perks, thanks to its built-in Legendary effect).
Perfect Storm
The Perfect Storm, like many exotics, can be outclassed by late-game RNG weapon drops, but as a lightweight level 10 SMG, it can get newcomers into Fallout 76’s early quests. The Perfect Storm inflicts 24 burning damage on enemies for 3 seconds in addition to its base 14 ballistic damage (with a nice accompanying visual effect).
Notice that the burning damage does not accumulate, but 3 seconds of 24 damage ticks are enough for lower-level opponents. To obtain their own Perfect Storm, players must complete the “Cold Case” search in Fallout 76. To begin the search, go to Wavy Willard’s Water Park and battle any ghouls you come across before prompted to talk with the Miss Annie robot.
Since Fallout 76 uses a strict stats scheme, some weapons will not be beneficial on all builds. Heavy arms can be too much for an unoptimized player without the right Perks, particularly in their inventory-crushing ammunition. Black powder weapons with fast reload and damage Perks can be overwhelmed in a unique construct.
Multiple loadouts may be fairly managed in compliance with the Stash, given that the Perks scheme provides for card-swapping, while certain weight perks extend to personal inventory. In other words, reducing the weight of heavy guns would not prevent a Fat Man Launcher from clogging up your Stash.
Fallout 76 also has a lot of DNA in common with the looter-shooter genre. Low-tier weapons with a randomized Legendary buff can be more valuable than higher-tier exotics that are sophisticated but vanilla.
Others seem to be awesome on paper but fall short in practice, either due to glitches in the code or a lack of Perks. Consider this a starting point for figuring out any realistic combat options before you’re storming nuke sites and dispatching Legendary Scorchbeasts in no time.
Minecraft has a lot of features that make it popular for all. Minecraft is a sandbox game of endless possibilities for exploration and development. It keeps players occupied with a variety of tasks, goals, and challenges. The villager’s Job block is another significant aspect of Minecraft that will be discussed in this article.
Let’s talk about villages before we talk about villagers. Villages can appear everywhere in the universe, including plains, deserts, and snowy regions. The villagers’ presence reflects the biome in which they spawn. Villagers are a friendly bunch. They are called passive mobs in Minecraft because they do not strike unless provoked. Villagers’ primary responsibilities are to serve in their fields, multiply, and communicate.
The village’s currency is emeralds, which can be used for trading. You can’t trade with anyone in the village; you can only trade with those who are working. Many unemployed villagers can be identified by their presence. Unemployed villagers are deliberately looking for a vacant work site block that has not been occupied by another villager.
You can also offer villagers jobs to make items; all you need is a bed, a villager, and a work block. Trading with villagers gives you and the villagers experience, which will help them level up. Any unemployed villager in Minecraft may be allocated to one of 13 positions. An unemployed villager looks for work within a 48-block range, and once he gets a job block, he emits green particles.
Let’s take a look at the complete list of work blocks:
Fletching Table
The fletching table block contains bows, arrows, and flints for flashers. Two flints, two flints, and four wood planks are needed to make a fletching table.
Cauldron
Leatherworkers can use the cauldron job block. The cauldron is naturally generated in swamps and can be mined with a pickaxe. Leather and house armor are made from it. To make a cauldron, you’ll need seven iron ingots. Arrange them in a 3×3 grid.
Barrel
The barrel job block is mostly used to store products by fishermen who sell fish. They arise spontaneously in the fisherman’s cottage. Water, lava, and pistons will all be used to drive barrels. Six wooden planks and two wood slabs are needed to construct a barrel.
Composter
Farmers use the composter, which transforms farm and vegetable waste into bone meal. Composters are also used in fields, and 7 wood slabs are needed to make it in a 3×3 grid.
Cartography Table
This work block is for cartographers and includes maps and banner patterns, as the name implies. It’s also used to zoom out maps and can be found in a cartographer’s home. 2 paper and 4 wood planks in a 3×3 grid are used to create a cartographer bench.
Brewing Stand
Clerics who sell supernatural products use brewing stands to sell their wares. There are also brewing potions, lingering potions, and splash potions available. Ships, igloos, and churches all automatically produce brewing stands. 1 blaze rod and 3 cobblestones can be used to make a brewing stand.
Smoker
Smelting food and selling emeralds and grilled meat are also done in the smoker. This is the butcher’s work block. One furnace and four wood logs or stripped logs are needed to make a smoker.
Blast Furnace
Armorers may use this work block to smelt mineral blocks or ores. 4 iron ingots, 1 furnace, and 3 smooth stones in a 3×3 grid are needed to make a blast furnace. As compared to a normal furnace, the smelting time would be doubled.
Lectern
The Librarian trade, which provides enchanted books, has a main job block in the form of the lectern. Lecterns are usually used in village libraries, although they can be made with 1 bookshelf and 4 wooden slabs of any type arranged in a 3×3 grid.
Stonecutter
The stonecutter block is used for masons. Stonecutter is a person who works with stones and bricks. You must craft a stonecutter with 1 iron ingot and 3 stones to allocate it to any unemployed.
Loom
Looms are another block that can be naturally produced in Shepherd’s House. Shepherd sells a variety of wool shades and paintings. To make a loom, take two strings and two wood planks and arrange them in a 3×3-square grid.
Smithing Table
A smithing table is available for toolsmiths. Toolsmiths have a wide range of instruments of differing quality. These blocks can form spontaneously within the toolsmith’s residence. It can also be made of two iron ingots and four wood planks.
Grindstone
The weaponsmith career is represented by this job site block. Repairing objects and equipment is done with grindstones. In a 3×3 carving grid, you can make Grindstone with two rocks, one stone slab, and two wood planks. Swords, axes, brass, and even gems are available for purchase at Weaponsmith.
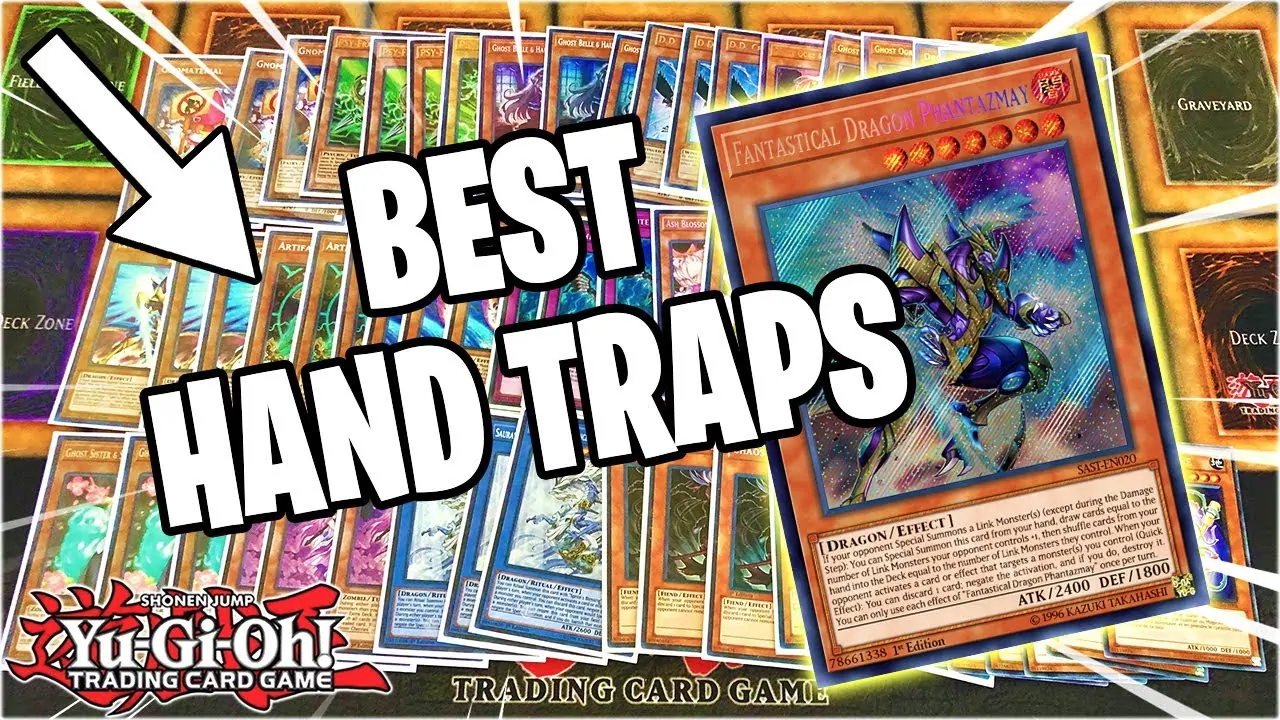
The word “hand trap” is one of the most unusual to occur in recent years in the game. It could not make sense to a player who left after the original season, or even in GX. It’s not a proper term; it’s an unofficial one that refers to monsters that can activate effects in hand that can be used throughout the opponent’s turn, often disrupting the opponent’s play and, in extreme cases, terminating their turns.
These cards have increased in popularity in the last four years because they don’t need players to set them, allowing them to prevent any of the spell/trap elimination that has been more common as the game has progressed. This list discusses the best Yu-Gi-Oh hand traps, including what they do and why they’re so great.
Ash Blossom & Joyous Spring
Ash Blossom & Joyous Spring can be used to prevent the enemy from carrying out whatever preparations they have for this turn. When the opponent uses any card (monster, spell, or trap) that has the effect of adding a card to their hand from the deck, special summoning from the deck, or sending a card from the deck to the graveyard, you discard this card.
If you have several copies of this card, you can constantly prevent your opponent from slyly summoning a powerful monster or, at the very least, postpone them, allowing you time to react.
Gorz the Emissary of Darkness
You can special summon Gorz the Emissary of Darkness from your hand when all hope is lost, your field is empty (both your monster and spell/trap zones), and you take damage from an opponent’s deck.
Gorz not only has 2700 ATK, but he also has an impact that changes depending on the amount of damage you take. If the damage was from a fight, he summons a level 7 Emissary of Darkness monster token with the same ATK and DEF as the damage.
If that was an effect, you can actually deal the same amount of damage to your enemy. Gorz, in addition to being a powerful monster, punishes your opponents for large-scale attacks; the more damage they deal, the better your token or the more damage you mirror back.
Effect Veiler
Effect Veiler is a fantastic Tuner beast to have in your collection. Despite the fact that this winged beast has no attack or defensive points and only one-star level, its influence is undeniably beneficial.
You should use Effect Veiler’s Fast Effect during your opponent’s Main Phase. You can transfer Effect Veiler from your hand to your Graveyard and then attack one of your opponent’s Effect Monsters with this monster card. All of the consequences of the monster you pick are negated before the end of this turn.
Skull Meister
Outside of its first inclusion in the Starstrike Blast box, Skull Meister has only seen a few printings, only appearing in a Special Edition and Structure Deck. Skull Meister has the ability to discard itself from the hand to negate any card effect triggered in the opponent’s Graveyard.
This isn’t only limited to monsters; it can even negate spell and trap cards that have Graveyard effects. Skull Meister is a very flexible card that has been in and out of the meta for a long time, depending on how many Graveyard-heavy decks are present.
Battle Fader
If all of your monsters have been erased from the ground, or if your enemy has monsters that can disregard your monsters and assault you directly, Battle Fader is an outstanding last line of defense.
When you have this card in your possession, you can summon it and end your opponent’s combat process when they threaten to take your life points. This makes this card ideal for when you’re on the verge of losing a game and desperately need something to help you turn the tables or slow down your opponent’s momentum.
Tragoedia
Tragoedia works in a similar way to Gorz, albeit with less stringent summons requirements. This time, if you take combat damage (regardless of how many spells/traps you control), you can special summon him. Tragoedia wins 600 ATK and DEF for each card in your hand, so if you use strong draw engines to keep your card advantage, he’ll reward you.
Tragoedia also possesses a number of unique level-related skills. To begin with, he has the rare level 10 and can be used to XYZ summon powerful rank-10 XYZ monsters. He can also target and permanently take possession of an opposing monster by sending a monster from your hand to the graveyard once per turn!
Finally, Tragoedia will change his level to match that of a monster in your graveyard (once per turn), which is helpful if you’re aiming for a certain rank in XYZ summoning or if you want to reduce the ATK-dampening of continuous spells like Burden of the Mighty.
Ghost Ogre & Snow Rabbit
Ghost Ogre & Snow Rabbit is a Light attribute card with zero attack points and 1800 protection points, making it a popular Tuner card. This adorable Psychic Form will assist you in removing monsters from your opponent’s side of the field that are proving difficult to combat.
You can use Ghost Ogre & Snow Rabbit’s fast effect to return itself to the Graveyard to kill the card that your opponent is attempting to trigger when a monster on the field triggers its effect, or when a Spell or Trap Card that is already face-up on the field activates its effect.
Nibiru, The Primal Being
Ever get tired of watching a combo deck’s play go on forever? Watching them summon through monster after monster while they build up some stupid board that’s impossible to get over? Enter, Nibiru, the Primal Being–the ultimate destruction.
When the opponent normal or special summons five or more monsters in a turn, the player can tribute all monsters on the field to special summon Nibiru from hand, then special summon a Primal Being Token to the opponent’s field. The downside of Nibiru is that the token it summons has the combined attack of all the monsters tributed to summon it, so the player better have a way to get rid of that token once it comes out.
D.D. Crow
D.D. Crow is an excellent card for totally removing a strong card from the opponent’s graveyard. Give the crow from your side to your graveyard and banish something in your opponent’s graveyard on any of your turns.
This is ideal for taking out a strong beast and preventing the opponent from getting it back into action. What’s more, the definition leaves it up to you to decide what you want to take out. It isn’t limited to certain monsters or forms, and you can do it at any time.
Red-Eyes Retro Dragon
Retro Dragon is one of the strongest Red-Eyes Black Dragon supporters in the game, and you can summon him from your hand when a level-7 or lower Red-Eyes you control is defeated by your opponent (via combat or effect) and sent to your graveyard. Retro then resurrects the vanquished monster(s) in the same place they were in when they died.
You can tribute Retro to win an extra regular summon of a Red-Eyes monster during your turn, or merely use his respectable (for his rank of 4) ATK and DEF to bolster a comeback attack, in addition to its amazing ally-rejuvenation. Finally, unlike supports like Black Metal Dragon, this dragon wears the Red-Eyes name and is a part of the archetype, making him easy to find and revive.
Psy-Framegear Gamma
If the Psy-Frames had been not slightly coherent, they may have been a nightmare. Omega banished cards from the opponent’s hand simply for holding them, according to their Psy-Framegears.
In any case, Gamma could counteract a monster effect triggered by the opponent when the player controlled no cards, but this involves a Psy-Frame Driver in the deck. What’s better? It used Psy-Frame Driver to special summon itself, granting the player instant board appearance and access to Psy-Framelord Omega.
Honest
This is the first card on the list of real attack points! Honest is a monster with the Light attribute that is able to protect you. His attack points are below average, at 1100, but his defense points are above average, at 1900.
You will return Honest from the field to your hand during your turn’s Main Phase. When another Light monster you control fights, you can send Honest from your hand to the Graveyard during the Damage Phase. Then, before the end of this turn, the monster you’re controlling scores attack points equal to the attack points of the monster it’s facing.
Infinite Impermenance
Yes, this is meant to be a “true” trap, but since it can be unlocked with the wrist, it still counts. Infinite Impermanence negates the impact of one monster on the field that the enemy governs before the end of the turn.
It can be accessed from the hand if the player does not have any cards in their possession, which means it can be activated by a player going second when the player going first is completing their combo. It also has the added advantage of negating the spell and trap effects of any spell/trap cards triggered in the same column when set, effectively making that zone worthless for the rest of the turn. It’s no surprise it’s selling for $50.
Deep-Eyes White Dragon
Deep-Eyes represents the Blue-Eyes family in the same way as Retro serves the Red-Eyes tribe. You can special summon Deep-Eyes from your hand if a face-up Blue-Eyes you control is killed by combat or an opponent’s card impact, and you have at least one dragon-type monster in your graveyard. If you do, deal 600 damage to your opponent with each dragon with a different name in your graveyard.
This devastating burn attack will deal tens of thousands of impact damage to your opponent, particularly if you have Dragon’s Shrine or Future Fusion in your graveyard. Deep-Eyes will also make the ATK equivalent to that of a dragon in your graveyard when regular or rare summoned, always netting at least the 3000 that a Blue-Eyes White Dragon will have.
Finally, if your fielded Deep-Eyes is defeated by a card effect (including your own), you kill all monsters your opponent controls, an excellent escape effect that discourages your opponent from using nonbattle removals, which could be their only choice given Deep-3000+ Eyes’s ATK.
Chronograph Sorcerer
This is the first Pendulum card on the list! Chronograph Sorcerer is a text-heavy card that many novice duelists avoid, but that doesn’t have to be the case. Here’s the skinny on this beast: Level six, Dark feature, and a Spellcaster with 2000 attack points and 1700 defensive points. This card has two effects: a pendulum and a regular monster effect.
During your turn’s Main Phase, destroy this card and choose one “Timegazer Magician” from your hand or deck to put in your Pendulum Zone or Special Summon. If a monster you control is defeated by combat or a card effect, you can Special Summon this monster from your hand, then Special Summon another monster from your hand.
Beginning a gambling club is entirely beneficial, yet you need to consider authorizing and understanding the laws of getting a permit and knowing the sum you need to make it. Albeit beginning a club requires a ton of ingenuity, when the focused on crowd comes to think about your business, it returns plenty of benefits to the proprietor.
When you need to catch the required crowd’s consideration, you need to assemble your business around the delight and fulfillment of the clients, and you should be committed and invest a ton of energy to have the option to secure the planned benefit.
The means should have been ready to begin your online club business incorporate:
Ensure You Have a Gaming Permit
Each nation has its guidelines when managing securing permits to operate the casino mobile aams, and the interaction can be highly tedious. It likewise contrasts in those nations that permit betting administrations.
Nations partition themselves into various classes, and they incorporate the accompanying
Countries that permit betting administrations are pivotal in the administering of their business sectors.
The convergence of the advertising and limited time exercises ought to be an essential factor.
The production of web-based betting sites is critical.
The nations that chiefly uphold and oversee betting offices incorporate the Unified Realm, Alderney, Isle of Man, Gibraltar, Malta, and Curacao. When you need to begin a gambling club business, you need to choose an authorized organization relying upon its standing, the cost of gaining the permit, and the grant term. The best-authorizing organization incorporates the White Mark Gambling club Framework when you need to begin the activity quickly. In any case, if you are in no rush, you could settle on Turnkey Gambling club authorizing that requires a month to be dynamic.
Make a Gaming Site
Making an all-around planned site is vital, for it’s the principal thing your clients will see when investigating your gambling club business. You ought to guarantee the site is appealing and extraordinary so that it’s not like another gambling club’s business. You ought to likewise ensure that you deal with the front-end combination with your data set and improve the current route convenience.
Secure Confirmed Methods for Installment
Online clubs are worldwide, and you ought to guarantee that the methods for installments bargain global business exchanges that include sending and getting installments universally. You ought to ensure your gambling club upholds e-installments so the individuals can pull out and send cash. You ought to likewise consider conventional techniques for exchange like the utilization of Mastercards and vouchers. To guarantee security with the sales, you should consent to numerous arrangements with different exchange organizations.
Showcasing and Advancement Exercises
Advertising your business is the last advance. Whenever you’ve set up every one of the necessities, you should sell your business. You ought to make an effective advertising technique and make a subsidiary framework that empowers site commitment and lifts traffic. If you need to keep your dependable individuals or draw in new individuals, you ought to present unwaveringly programs, set up rewards and maintenance missions to persuade your players. If it’s not too much trouble, discover your rivals and know their shortcomings, and evade those shortcomings in your gambling club.
The amount it Expenses to Begin a Gambling club
Making an online club without any preparation is more costly contrasted with a templated plan arrangement, and a round of five suppliers will set you back more contrasted with one supplier. It would be best if you cooked for the pre-dispatch and post-dispatch stages, and it is separating into different structures; you need to ask about the product costs, which range from around 30-40% of the general expense, the promoting exercises that range from 30-40% and permitting methodology that ranges from 10-20% and compensation.
Before the club is done and running, you will guarantee a more significant number of expenses than when the online club is at long last wholly settled. Finishing the business isn’t the prior advance; you need to give showcasing and advancement costs that represent many costs. For different consumptions, you need to take a gander at our staff’s compensations, permit charges, and month-to-month/yearly sovereignties top game suppliers.
Something else to consider when beginning your online gambling club is dependable client care and consistently notice consistency.
Conclusion
Beginning a club is an extensive danger, and you ought to have the option to get all the vital information and assets to be excellent at any remaining betting organizations. It might be ideal on the off chance that you generally searched for approaches to benefit your business and get numerous clients.
The Elder Scrolls V: Skyrim’s combat is fairly consistent. Different builds have different strengths and disadvantages, but almost all will agree that a magic build is the most versatile and adaptable playstyle. Each form of magic has a distinct emphasis, such as healing, summoning, defensive, or attack spells.
The Destruction school of magic has the most consistent damage-dealing spells in the series. While some mods bring a slew of new spells to the game, the base game already has plenty of powerful elemental spells that do fire, frost, and shock damage.
Each factor serves a purpose, with fire inflicting additional damage over time, frost exhausting stamina, and shock annihilating enemy Magicka. However, contrary to common opinion, the Destruction school’s most powerful spells aren’t always higher mastery levels, and some can be cast right away.
Flame Cloak
This wall of fire lasts 60 seconds, dealing 8 points of fire damage per second to enemies within range.
Since it fills the Dragonborn with a powerful aura of fire, this is better used for war mages and melee warriors. Damage isn’t great, so if the enemy is still on fire, they’ll take even more fire damage, which adds up quickly.
This spell is an Adept level 50 art, so it will take some time to master it, but it is well worth studying. Flame Cloak can be obtained by speaking with Faralda at the College of Winterhold.
Freeze
This is a spell that can only be used by players who have activated the Dragonborn DLC. It’s a classic spell that uses the frost element’s inherent benefit to slow down attackers. Using this spell at close range can be destructive, particularly if the player’s follower is a high-damage tank character.
Freeze summons an ice spike that does a small amount of damage (20 points) to both the Health and Stamina pools. For 15 seconds, the opponent is now greatly delayed, making for an easy takedown.
Ignite
Over time, fire damage is one of the most reliable types of damage in Skyrim. The ignite spell sends out a burst of flame to set targets on fire at a low cost. For a one-time cost of 30 Magicka, this spell pays off because you can set enemies on fire and then turn to more powerful spells as the fire does its job. This spell isn’t the strongest in the world, but it’s a valuable weapon for any enterprising fire mage.
Frost Cloak
This wall of ice, like the Flame cloak, lasts 60 seconds and keeps hitting with powerful frosty spells. It does the same amount of damage to all enemies in sight, dealing 8 points of damage per second. While this spell is easy, it is very powerful against melee monsters.
You can also speak to Faralda at the College of Winterhold about getting Frost Cloak, or you can get it from a Court Wizard if you pass level 50 in Destruction spells.
Icy Spear
The Icy Spear spell, which is identical to Freeze, is a Frost spell that becomes usable when the player achieves Expert level Destruction magic. It’s a spell that uses a lot more Magicka than Freeze, but the effects are well worth it.
Icy Spear does about 60 points of damage to an enemy’s Health and Stamina pools. It’s especially effective against opponents who rely on their Stamina pool to launch powerful attacks.
Flames
Flames is the first spell that any destruction mage can learn and use. This is the devastation spell that any early player could be using, with strong damage and the ability to set opponents on fire to inflict increasing damage over time.
Since the spell works by focus, it’s also very effective for crowds of enemies at higher levels. Holding the cast in one hand causes a relentless stream of fire to rain down on unprepared melee opponents, evaporating their health and returning them to Sovngarde.
Whirlwind Cloak
Since it has less of an elemental focus, this spell is the best option for destruction mages and melee warriors.
This cloak spell is similar to the two previous cloak spells in that it does similar amounts of damage and uses the same mechanics, with the exception that it will send the enemies flying into the air and build some actual space.
Casting this creates a vortex around the Dragonborn, scattering attackers. It’s an Adept-level talent that lasts 60 seconds. Once you’ve reached a standard where you can use it, you can buy it from Talvas Fathryon.
Wall of Flames
Area-of-effect spells are a lifesaver for mage characters while battling several enemies in a room. The player can gain access to a spell called Wall of Flames at the Expert stage of Destruction, which is an outstanding field denial spell.
The Wall of Flames must be cast on the floor, where it will create a flame-filled field. The wall does about 50 damage per second, which is a significant amount of damage against opponents that like to rush the player and play at close range.
Wall of Storms
Wall of storms is a high-level damage spell that can be very useful. Casting for 145 Magicka per second is a significant investment, but producing a wall of lighting that deals 50 points of shock damage to health and Magicka easily adds up.
With the potential to inflict massive quantities of shack damage to a large number of enemies, devastation casters should often consider using this spell, particularly when being pursued by unrelenting draugr or bandits.
Wall of Frost
This spell, like the Wall of Storms, is cast on the ground to build a literal frost wall.
This monster has a terrifying appearance and does 50 points of harm per second. This, like other related elemental spells, is better used in conjunction with another frost spell to increase the overall damage dealt.
It’s important to note that this isn’t something that goes away quickly. Simply pay approximately 130 Magicka per second that this wall is on the earth.
Faralda can provide you with the Wall of Frost, but you can also try your luck searching through chests for random loot. It’s not the best offensive destruction spell, but it’s a good one for balancing out the magic’s offense/defense structure.
Frost Rune
When an opponent approaches, this Magic Rune lays a pit on the ground that explodes. Consider it to be an ice landmine. This rune is widely recommended in comparison to the Lightning and Ash runes because it slows down opponents, making it perfect for a classic ambush.
These spell runes are best used to deal with enemies that are hibernating or encased behind locked doors. Everything you have to do now is cast it as close to the goal as possible and enjoy the ride.
Fireball
Fireball has a range of over 15 feet and does 40 points of damage on everything it touches.
Once cast, you’ll unleash a massive firestorm on your foes. This is particularly useful for something vulnerable to flames. Even though this is a common devastation spell, use it with caution because it can even reach followers if you have someone on your side.
You must be level 40 in Destruction to obtain Fireball, and the spell tome can be purchased or obtained randomly in Black Falls Barrow.
Incinerate
Incinerate is a must-pick against any foe since it is a classic fire spell and the bread and butter of any fire mage specialized in Destruction spells. It’s only open to players at the Expert stage, making it a challenging spell to master.
Incinerate, on the other hand, is a potent fireball that deals around 60 points of damage. As is customary with the fire aspect, enemies that are affected can continue to burn and take damage over time.
Blizzard
As a rare master class spell, Blizzard is the most powerful frost magic spell in the game. Blizzard, which works similarly to a flame cloak but has a longer range, does 20 damage per second to any opponent who approaches the spell’s impact for the length of its 10-second duration.
To melee or other non-magic builds, the 200 damage over time can be a huge damage boost. This spell is particularly effective against large numbers of enemies or aggressive melee opponents that are likely to pursue the Dragonborn and remain beyond the blizzard’s range. When attacking with other spells or weapons, this is an excellent spell for dealing damage over time.
Chain Lightning
Area of Effect (AoE) abilities are best at quickly dispatching huge numbers of enemies. Chain Lightning stuns close rivals and bounces across the field, striking far away foes as well. This is good for dungeons with a lot of opponents, and it also does a lot of harm to enemy Magicka stats, so it’s good for battling groups of spellcasters.
As compared to the Icy Spear, accuracy isn’t as important because this thing can bounce around the room like a super ball if it misses one opponent. Plus, since this is an Adept-level talent that is easy to acquire, it’s worth picking up even at a low level.
Lightning Storm
Lightning Storm is similar to Flames in that it involves both hands and stops movement. It fires a powerful beam of electricity that inflicts 75 shock damage per second on enemies trapped in its crosshairs.
The damage of this spell is incredible, and it also reduces enemy Magicka values by half, making it a great choice against mages. Much better, regardless of bonuses, this spell will disintegrate enemies before it destroys them. This is the most enjoyable spell in Skyrim, but it lacks the area scope and ease of use that a master-level spell should have.
Fire Storm
The Dragonborn erupts in a 100-point flaming blast, causing huge damage to all enemies within range. This spell encapsulates all that fire magic is supposed to be. The closest opponents are to the Dragonborn, the more harm the spell does to them.
As the player charges into combat, this ensures massive damage to vast hordes of dragons. In general, the firestorm spell can make players feel unstoppable. Catching a skeever and obliterating it with this ridiculously strong fire explosion spell is the ultimate pleasure.


![Bloodied Assault Rifle + [25% FFR] + [15% Faster Reload] - Max Level, 3 Stars: Weapons - FIFA Coins, Buy WoW Classic Gold, Game Key Deals](https://www.mmoga.com/images/games/fallout76/items/1155461_desc.jpg)