Home Blog Page 596

Playing Blackjack: Concentration is More Important Than Memory

0
poker-casino-gambling
Moos-Media (CC0), Pixabay

In terms of popularity, blackjack is ahead of other gambling games. This trend is typical for both stationary and online casinos. This game has already had many versions, each of which has its own army of fans. Rules and possibilities may change, which makes the game more interesting. Depending on the format chosen, up to eight decks of cards can be used in the game. This brings variety to the game and allows for a unique experience for the players. In terms of winning, the casino is in a more advantageous position in relation to the player. But the advantage is small. If you approach the game with your own strategy, you can always increase the chances of winning.

Rules of the game

The main task of the player is to score 21 points or bring his combination closer to this value. If the threshold of 21 points is exceeded, a loss occurs.

It is important to know the numerical value of the cards during scoring:

  • if it fell from 2 to 10, then the player collects the number of points indicated on the card;
  • when there is a jack, queen or king in his hands, it means that the player received ten points;
  • the value of the ace can change at the decision of the player – it will be one or eleven.

In online blackjack Australia, the game is played with the dealer. As for the bets, they must be placed before the distribution. In the classic version, both the player and the dealer receive a pair of cards. The casino visitor receives the cards face up. The dealer only opens one. In the case of an ace and a ten-point card, a win is announced without continuing the round. The main thing is to decide correctly – whether to take cards further if there is no blackjack on hand.

The likely outcome of events in this case:

  1. Draw cards up to the maximum approach to 21.
  2. Refuse to receive a card. You can be happy with the alignment and not tempt fate further. If the dealer hands over a combination of 21 points, he will lose. If the sum of the cards is closer to 21 points than the opponent’s, the dealer wins.
  3. Doubling the bet. The player has the right to double the initial bet when a great combination hits his hands. Then he receives only one card.
  4. Splitting cards. A situation may arise when the player is dealt the first two cards of the same value. Now he has the right to split them into a pair of separate bets.

Online blackjack strategies

Every online casino user dreams of winning. For this, strategies are being developed that significantly reduce the mathematical probability of winning the casino. The strategy called “play the dealer” has proven itself well. The peculiarity is not to take a combination exceeding 17 points. In this case, you should not pay attention to the dealer’s alignment. And here concentration is much more important than memory.

The next option, “no rage”, is based on stopping when the combination exceeds 11 points. The odds of hitting an ace or ten are pretty significant. Therefore, it is worth stopping at this value and not moving on, hoping for a dealer’s mistake.

The classic strategy is based on the actions to be taken after familiarizing yourself with the opponent’s starting cards. The player will be helped in this case by a special table of the mentioned blackjack strategy. During the entertainment with the Internet platform, it is necessary that the table is located in front of the player’s eyes. As the statistics show, in this case, it is possible to reduce the advantage of the establishment.

Existing versions

Online blackjack has long won the hearts of online gambling fans. It is not difficult for a player to find a set of different versions of blackjack in the list of games of various online casinos.

A list of the most requested online blackjack options:

  1. Blackjack Switch. Here the player will compete on two fields at once. The user gets the right to transfer cards between tables when the first deal occurs. This version is most similar to the traditional version.
  2. Double exposure game. The nuance is that the first two cards are dealt with by the dealer face up. Mathematically, this increases the player’s chances of winning.
  3. Double attack version. There is an opportunity to double the bet or interrupt the game process at will.
  4. Pitch Blackjack. There are two decks of cards on the table. The surrender takes place face down. As it happens at the poker table. The rest of the rules do not differ from the classic version.
  5. Multi-Hand Blackjack. It is a traditional blackjack game. The peculiarity lies in the fact that the player acts simultaneously on several tables. Most often these are 3 or 4 fields. In total, the casino uses 8 decks of cards.

Key recommendations

Here are some tips from experienced gamers to improve your chances of winning:

  1. You should settle for a total of 17 points, especially if the dealer rolls a nine or more.
  2. If the dealer has 4-6 points on the table, it is necessary to slow down the game with a deal of 12 points or a little more. Don’t forget to double your bid.
  3. You need to double your bet when the dealer’s upcard is 9 or less. In this case, the player must have 10 or 11 points in his hands.
  4. You need to be sure to split a pair of aces.
  5. Ignore the insurance offer.
  6. It is better to give up than to constantly double your bets with a weak combination on your hands. This is not poker.
  7. At the initial stage, it makes sense to apply a basic strategy. This should apply not only to the first pair of cards but also to the further game.

Live Blackjack

Live communication with a dealer is a trend in modern online gambling. This option is used by regular players on online platforms. Using innovative technologies in online blackjack, the user can experience emotions comparable to being in a land-based casino. According to the players, this type of entertainment is more pleasant than a competition with impersonal software. The client is pleased with the live voice of the dealer. As for the rules, they do not differ from the classic versions of blackjack. Experienced users strongly recommend using this mode, especially during a pandemic when stationary casinos are closed due to sanitary requirements. It can be important for an online casino visitor to feel the original atmosphere of a gambling establishment in order to fully surrender to the process of the game.

Blackjack Tournaments

The existing online tournaments provide a unique opportunity to evaluate your experience and practical skills among the best players on the planet. If you really focus, you don’t need to use your phenomenal memory to win online blackjack Australia.

Virtual tokens are distributed to all participants and the process continues until there is one winner with the entire amount of chips left. After that, the winner goes to the final and plays among other champions. It is prestigious and pleasant to become a winner in the end. The rules may differ in different types of competitions. Therefore, it is important to thoroughly study them before each tournament. The size of the prize pool can also vary.

Conclusion

It is not for nothing that blackjack has been at the peak of its popularity for many years. Moreover, this is typical for stationary establishments and online gaming platforms. The basis of the demand for the game is the minimal advantage of the casino and genuine excitement. It is not difficult to apply conventional strategies based on the theory of probability here. Concentrating on the game allows you to consistently receive big wins.

Best Fallout 4 Perks To Use To Beat The Game

0
maxresdefault-21-7

Aside from its vivid post-apocalyptic universe, Fallout 4 is one of the greatest games for generating unique characters. Unlike many other games with objectively powerful builds that most players go toward, Fallout 4 allows the player to choose from various perks and specialties.

Although it is recommended that you try out different builds and play through the game multiple times to get the full experience, there are a few perks that can give your character a powerful advantage and are worth investigating for any player looking to create the ultimate post-nuclear wasteland hero.

We’ve chosen to give five extra perks that every player should acquire in their next playing of Fallout 4 to reflect the original single-player experience that the Fallout franchise was designed to be.

Locksmith and Hacker

f4_lock_02-4637250

These two benefits aren’t the most unusual, but they’ll come in useful in the long term, depending on whether or not you bring a friend along and who that partner is. If you know one of your friends will have one of these abilities, choose yours appropriately.

These two will get you access to terminals and safe boxes early in the game, which may contain essential or lucrative items. These are worth considering if you’re the kind to run about plundering and grabbing whatever you can.

Gun Nut

gun-nut-upgrades-7355252

There are three distinct types of perks in Fallout 4 that will increase the damage of your weapons. Whether you choose melee weapons, normal firearms or energy weapons is all up to you. Gun Nut is the best choice for someone starting their quest for the first time, as each upgrade raises Small Gun and Repair competence by five.

It’s a terrific baseline perk to invest in, and it’s unquestionably a cornerstone of the game’s benefits. If you really want to shake things up, try a melee build with the Blacksmith perk or an energy build with the Science! perk.

Blitz

maxresdefault-9648277

Who said Fallout 4 couldn’t be defeated in close quarters? Due to how strong it can be when utilized appropriately, this perk will be a must-pick for any melee gamers who desire to win the game with just short-range weapons.

As long as you have a method of getting up to your opponent, Blitz allows you to narrow the space between you and your foes swiftly. You’ll get a damage increase to your melee attack in Blitz when you level up this perk, which is measured by the distance you’re closing.

Sneak

stealth-mode-7983128

Sneak is also a fantastic choice for individuals who wish to go around their foes and set up close-range moves, depending on your character build. Players begin with a 20% stealth boost, which rises by ten percent with each level of this perk.

Other skills that match nicely with Sneak include excellent agility and Stealth Boy, which are ideal for turning your hero into a quiet murderer.

Scrounger

maxresdefault-3720243

Loot is one of the most vital items to keep the Sole Survivor going to survive in the wilderness. It’s critical to discover truly decent stuff and make use of all the benefits you may obtain when it comes to luck, especially at higher difficulty levels. This is why the Scrounger bonus is beneficial.

When looting desks and crates, the Sole Survivor will find additional ammunition thanks to this perk. The possibility increases with each level until it reaches 100% at rank 3. Emptying a gun at level 4 allows you to reload an extra magazine, which is much more convenient.

Toughness

maxresdefault-3607299

We consider any perk that improves your character’s capacity to live to be a plus, which is why Toughness is one of our favorites. When you initially unlocked, you gained a 10% resistance to all damage, which rises by ten percent as you level up.

Toughness is an excellent addition to any character. Still, it will be especially useful if you’ve opted to wear Light Armor and require a little additional endurance to get through your fights.

Critical Banker

critical-banker2-2813590

This perk, which allows you to save critical hits for later use, will be your best buddy if you enjoy critical hits as much as we do. In the initial level, the player only has one critical hit saved in the “bank,” but as you continue, you unlock more critical hit slots.

When Critical Banker is completely leveled, you’ll be able to stockpile up to four critical hits and show those desolate beasts what you’re made of. We recommend acquiring the Far Harbor add-on to unlock your last fifth critical hit if you truly want to go all out with this perk.

Quick Hands

maxresdefault-2679835

Fallout 4 is a game with a lot of action. Combat against a formidable adversary might be ended in seconds if the player isn’t attentive. This is why it’s crucial to take advantage of the surroundings while having handy perks like Quick Hands-on hand to help you out when things get particularly hairy.

Quick Hands allows the Sole Survivor to reload their weapon considerably more quickly. The Nuka World expansion is required to unlock the third rank for this perk. Reloading in V.A.T.S. costs no action points at rank 2, while the reload time is already 35 percent faster at rank 1.

Four Leaf Clover

maxresdefault-4412632

When it comes to critical hits, you’ll need a lot of luck to boost your chances of obtaining one. With each achieved level, Four Leaf Clover boosts your critical hit probability by one luck point.

When you combine this with Critical Banker, you’ll be able to hit your killer shots and bash your foes’ heads in for a lot of damage. We strongly recommend both of these perks to increase your survivor’s deadliness because they are suitable with almost any build.

Wasteland Whisperer

maxresdefault-3716760

This benefit may raise some eyebrows but bear with us. While your trip across the wastelands in Fallout 4 should be all about strategy and making the proper decisions, a little fun never hurts.

When you’re dealing with a bunch of adversaries you can’t seem to get through, summon one of the monsters who roam the lands with you to provide the ideal diversion while you feed on your foe. After all, who wouldn’t want a Super Mutant companion or a tame Deathclaw to accompany them?

Medic

maxresdefault-5551350

It’s critical to keep an eye on one’s health while enduring the horrors of the wasteland. Because stimpaks aren’t as abundant at higher difficulty levels, getting the most health out of them is critical. This is why, despite its simplicity, the Medic perk is so valuable.

The perk also influences how RadAway removes much radiation damage, so it’s a two-for-one bargain. Both products restore 40 percent of lost health and erase 40 percent of radiation damage incurred at level one, which is a considerable boost.

Ghoulish

maxresdefault-3867823

Ghouls have some very incredible advantages. Yes, they’ve lost some of their humanity, but they also don’t appear to worry about radiation, despite the fact that it has already wreaked havoc on their bodies and brains. These benefits are now available to Sole Survivors as well.

When the Sole Survivor is exposed to radiation, the Ghoulish perk makes it heals them rather than harming them. Each successive tier increases the amount of healing done by radiation.

Action Boy

fallout_4_leak_3-4014507

V.A.T.S., a crucial aspect of gameplay that allows the Sole Survivor to do a lot more in a short amount of time, would make Fallout 4 a very different game. When the correct perks are unlocked, V.A.T.S. has a ton of benefits, from critical hits to studying foes. One of them is Action Boy.

Because utilizing V.A.T.S. costs action points, a perk like Action Boy is almost essential for any V.A.T.S.-heavy setup. The regeneration percentage increases at each tier, reaching a maximum of 75 percent at rank 3, which is accessible in the Far Harbor DLC.

Idiot Savant

maxresdefault-1805040

The Idiot Savant perk in Fallout 4 ensures that you don’t have to be clever to succeed. Sure, your character may be comically stupid to some extent. Still, at the end of the day, you’ll be the one to gather all the experience points and level up into the wastelands’ strongest and stupidest survivor.

You can get up to three times the XP you normally get from any action at level one. If you have an extremely low IQ, the chances of this happening are growing.

Rifleman

rifleman-perk-8789783

We have one view: rifles are by far the finest and most enjoyable weapon in the game. So, why would you choose anything other than Rifleman? The benefits with each level are awe-inspiring, starting at 20% at level 1 and increasing by 20% with each subsequent level.

Once you reach level 4, you also have a possibility of crippling the enemy’s bodily part you’ve struck. This perk affects all rifles, muskets, and shotguns, so if you want to execute your opponents from a distance while delivering substantial damage, this is an easy choice.

The Best Settlements In Fallout 4 Ranked From Worse To Best

0
a1

The opportunity to aid the Minutemen in recovering the Wasteland by building towns for other wastelanders is an intriguing element in Fallout 4. Players may build out a mini-empire in the Commonwealth with enough elbow grease, which will give a continuous flow of caps, supplies, things to buy, and even military help in war.

A few towns stand out among the many available in the game in terms of what they can give the player. Here are the greatest towns in the game, whether for a defendable territory, cropland, or pleasant aesthetics.

Warwick Homestead

maxresdefault-4320666

An abandoned sewage treatment plant has been turned into a village known as the Warwick Homestead. The main structure is rather vast, and with some creative use of staircases and walkways, it may be a fun and secure venue.

There is also some farmland, and the Warwick family will have already planted a few Gourd plants. Making a home out of a sewage treatment facility may sound like a bad idea, but the Warwick Homestead is really a good site to shelter your allies and grow food.

Kingsport Lighthouse

2fowpfl4du521-2283772

The Kingsport Lighthouse has a medium-sized building space, but it already has a lighthouse, a dwelling, a pier, and a small agriculture plot. It also includes natural fortifications in the form of the ocean and rock ledges, forcing attackers to approach either the dock or the road, both of which are simple to defend without being there.

Although it isn’t the largest or most spectacular colony, it is dependable and makes a significant contribution to your empire. Build defenses, scavengers, farms, and trade routes, then tie them all together.

Finch Farm

m3pztarq6jq11-8823770

When you first get it, the Finch Farm is fairly unattractive. A water pump, a cooking station, a modest cabin for a family of four, and a small plot of land with crops already planted are all included. You could get away with slapping a few farms and defenses up and moving on, but there’s a lot of untapped potentials here.

The building height extends up to the overpass above, allowing you to extend your colony up to this vantage point for extra housing, access to the streets above, and fantastic defenses by employing a series of staircases. In the end, it pales in comparison to the other items on our list, but it has the potential to be amazing if used correctly.

Starlight Drive-In

maxresdefault-6225187

This former drive-in movie theater is now an abandoned parking area with rusted automobiles and radioactive waste containers. Those automobiles and radioactive barrels may be scrapped for important materials, allowing you to construct the base of your dreams on a big flat surface.

Stacking survivors on top of each other is ideal for large-scale habitation. It’s also a wonderful place to keep your Power Armor collection, which may be proudly exhibited in a personal gallery.

Egret Tours Marina

stcssx5q4rc21-2754139

Given the run-down structures and random encounter spawn spot, Egret Tours Marina may appear unsuitable for a base (the latter meaning this place will be under attack often). However, it may be beneficial to both you as a player and your empire with the appropriate arrangement.

This base is brimming with water that can be generated and supplied to neighboring towns. Its closeness to the Edge of the Glowing Sea makes it an ideal staging site for expeditions into this perilous region. Focus on defenses, clean water, workshops, and one or two trade posts for supplies, and you’ll have a powerful outpost.

Covenant

fallout_covenant_loc-8521371

Almost as soon as the player obtains this modest town, it becomes an excellent colony. Walls are encircling the community, several residents, and a robot named Deezer that offers a can of Deezer’s Lemonade that restores 50 hit points on a regular basis.

The low ranking is due to the fact that the village is one of the smallest in the game, and there are already homes in place, making it uncustomizable. Furthermore, the fantastic gun turrets on the walls are a one-time item that can’t be restored once they’ve been destroyed.

The Mechanist’s Lair

6a-5382388

The Mechanist’s Lair is a superb town in terms of utility and distinct aesthetics, and it’s part of the Automatron add-on. It’s the house of the notorious Mechanist, who used her robots to bring peace to the Commonwealth. Her lair serves as the ideal camp for individuals who enjoy a bit of role-playing.

This underground facility features a hidden entrance for individuals who want to play as a crazy genius or villain. Although it will have to rely on another community for food because it cannot cultivate its own, the robotic factory creates a perfect setting for darker people.

Sanctuary Hills

yltbrai151x21-2834671

As they go on a mission to recover their stolen son, the Sole Survivor’s old house before the nuclear catastrophe can once again be their home. Players may reconstruct Sanctuary Hills into a makeshift post-apocalyptic suburb right out of the Rick And Morty episode “Rickmancing The Stone,” however, it will never be as good as it once was.

It offers plenty of area for the people and good farming, but it ranks low since protecting it may be difficult due to the numerous entry points. Not to add that living there is a little melancholy after the loss of your husband and neighbors.

Echo Lake Lumber

fh_echolumber-7920216

This old lumber mill is one of the game’s largest communities and serves as an excellent foundation. It takes a lot of effort to clean out the trash, but it yields a lot of wood and other building supplies, so it’s well worth it.

There’s a natural border in the form of a hedge, plenty of room for farming, and the main structure is more than adequate sheltering settlers. After clearing it up and having everything set up, it’s a robust town that can be self-sufficient and easy to defend.

Bunker Hill

fallout_bunker_loc-9327399

This colony is ideal for hunkering down and surviving a siege. It’s enclosed by a strong wall with a big door that keeps intruders out. It also has a big obelisk in front of it, but sadly, no development is allowed on top of it.

One of the nicest aspects of this settlement is the consistent flow of caps generated by the town’s existing business. Even if you don’t intend to develop or utilize it, after securing it and without any expenditure, the player receives an immediate passive revenue source, making it one of the better settlements to capture.

Graygarden

540057146-9511512

This unusual settlement easily reaches the top five due to its versatility and use. The Graygarden has a crew of Mister Handy robots that are busy harvesting and maintaining a greenhouse. In addition to the pre-built garden, the robots do not require any water or food to survive. This implies that the player may consume all of the food, sell to merchants, or support non-self-sustaining communities.

Another advantage of this town is that the highway above it is included in the construction zone. As a result, imaginative players might construct a gigantic stairway that leads up to it, including the area into the settlement.

Vault 88

xtg3uwxmajf21-2517848

The player can get this incomplete vault and use it as a new underground dwelling. It’s a massive area that rivals the game’s largest town and may be customized for any purpose. The quest to secure this vault also grants access to prototype technologies that can enhance the lives of settlers and make the task of managing a colony network much easier.

Unfortunately, the area in Vault 88 cannot be completely exploited due to the constraints on building sizes in the vanilla version of the game. However, this may easily be overcome with a little light tinkering to create an awesome underground base.

Abernathy Farm

6f79f587dd50043d38a5e4e402d6c844-8873311

At first look, there doesn’t appear to be much to this agreement. It’s a basic farm with an electricity pylon as its centerpiece. However, this poor farm has the game’s maximum construction restriction: the player may only construct a total of 20 floors.

It’s a fully functional farm with loads of room for even more crops, even for those without the ambition to create a 20-story castle. It’s a fantastic supply of food for your settlement network, with a wall and minimal fortifications.

The Castle

fallout_castle_loc-7108809

As the player’s settlement empire grows, it’s only natural that he or she should dwell in a castle. Once cleaned of Mirelurks, this stronghold of stone serves as the ideal base, complete with beds, medical facilities, an electrical system, an industrial water purifier, and a store of turrets.

It’s ideal for individuals who want something pre-made and ready to go, and after the holes in the wall are repaired, it’s extremely defendable. It doesn’t score higher because it’s already nearing its construction maximum and doesn’t allow much modification. But who needs a castle when you have one?

Spectacle Island

qmf8h40b3pj21-3861649

This large private island is easily the greatest town in the game. The beacon wards off Mirelurks once it is switched on, and a ship generator powers it. It also offers the most square footage and a reasonable height restriction, allowing you a lot of creative freedom.

It does, however, need a significant amount of effort. There’s a lot of trash, a lot of it underwater, and there’s virtually little infrastructure other than free electricity. However, it might be the ideal spot for gamers to create their own little island paradise or wasteland castle because of its size and natural fortifications.

All Borderlands 2 Classes Ranked From Worst To Best

0
diesel_productv2_borderlands-2_home_egs_borderlands2_gearboxsoftware_s5-1360x766-8546dab7d7968b51fae34f402d61c1f9ea1b6891

Borderlands 3 had rave reviews when it was launched last year, but its predecessor from 2012 is still a fan favorite. Borderlands 2 is still the most universally adored installment in Gearbox Software’s hallmark franchise. That’s why it’s placed first on our list of the best Borderlands games. It’s been repackaged and resold multiple times, with each iteration adding new graphics, skins, missions, and playable characters.

Despite the fact that the game is nearly eight years old, new people continue to join the servers. This is owing in part to the game’s inclusion in The Handsome Collection, which includes Borderlands 2, Borderlands: The Prequel, and all of their DLC in one convenient bundle. At one point or another, the collection was free on practically every gaming platform, and it is frequently included in huge discounts.

Another reason is that the game is still enjoyable. TWithits bold black lines and brilliant colors, cthe game’s comic-like aesthetic complements the game’s theatrical pandemonium and gives it a timeless vibe. Sniping Psychos and fighting Badasses nowadays feels just as nice as it did when we believed the Mayan apocalypse would wipe us all out.

maxresdefault-2218826

One of the most crucial decisions you’ll make in the game occurs immediately at the start when you must select a character and their related class. “So, who is the finest Borderlands 2 character?” some of you newcomers might think.

Before we find out who the greatest character in Borderlands 2 is, there are a few fast qualifications we need to get out of the way.

To begin with, BL2 is an extremely well-balanced game. Every character has their own special powers best suited to specific situations, and none of them are inherently weak or evil. If your favorite character rates lower than you thought, it’s most likely because they’re a little more niche than the rest.

Second, in addition to the initial four characters, this list will include two DLC characters. These characters are featured in The Handsome Collection, but you may need to purchase them separately if you have the vanilla version of the game.

Finally, bear in mind that each character has three separate upgrade branches to choose from. Because you won’t max out all three, your outcomes will vary according to how you spend your upgrade points and which abilities you get.

Psycho

maxresdefault-1111211

Back in March 2013, Krieg was the last character to be introduced to the Borderlands 2 roster. The Psycho has a Buzz Ax Rampage skill that causes him to lose control of his firearms and replace them with a massive two-handed ax that delivers 500% melee damage and heals itself after each kill.

The Psycho is a bit of a wildcard in the group of rated Borderlands 2 classes (which is really saying something in this game). You may turn him into a Mutant Badass Psycho and stomp on his foes with severe melee assaults, concentrate on weapons and grenades, or set yourself on fire to do extra fire damage while running screaming over the battlefield. This makes him a lot of fun to play but also a lot of trouble to position tactically. Locking yourself into a melee build might provide a number of difficulties.

Krieg’s Bloodlust tree is focused on kill skills and bloodlust stacks, while his Mania tree is focused on melee, and his Hellborn tree is focused on fire damage upgrades.

Assassin

maxresdefault-4971991

On most novice players’ initial (or even second) Borderlands 2 playthroughs, I wouldn’t advocate using Zer0. That isn’t to say he isn’t worth playing; he’s tricky to control and doesn’t get truly excellent until late in the game when his strongest skills are unlocked.

The Assassin is most suited to sniper guns and melee warfare. However, because so much of the game involves combating waves of mid-range foes, we are hesitant to endorse him. His health is likewise inferior to that of the majority of the other characters.

Zer0, on the other hand, possesses some of the strongest endgame skills and is far more valuable when partnered with a tank such as Salvador, Axton, or Gaige. Decapitati0n, his unique ability, allowing you to generate a hologram as a diversion while Zer0 himself fades away.

When it comes to skill trees, you may choose between the Bloodshed tree for combat skills, the Cunning tree for utility and damaging effects, and the Sniping tree for… well, sniping.

Siren

borderlands2_maya-3928969

Maya is the Siren, which is Borderlands 2’s closest equivalent to a support/healer class. Her Phaselock special ability generates a stasis bubble that begins as a basic mid-air suspension and grows into a force cage that deals damage.

When you’re playing as a Siren, your main strategy centers upon this unique ability. Phaselock’s cooldown is the shortest of any class’s special abilities, making it ideal for crowd control. Maya is a lot of fun to play as a solo player, but you won’t get the full benefit of her abilities unless you play multiplayer. If you want to learn how to play her for support, look at this “nurse build.”

Maya’s Cataclysm tree may be used to improve damage types, her Harmony tree can improve defense and health, and her Motion tree may be used to make Phaselock more of a defensive ability.

Commando

axton-build-1-2273691

What is the best character for newcomers in Borderlands 2?

Axton is your man if you want to change, reload, and shoot any gun in the game quicker. Axton is the most well-rounded character in the game, and we think he’s one of Borderlands 2’s greatest single characters. He’s also the greatest character for newbies who aren’t sure what playstyle they like, as several of his powers improve the game’s basic principles.

In practically every circumstance, his Sabre Turret skill comes in handy. When you drop a turret, it immediately begins firing at the nearest adversary. This is especially beneficial if you’re playing alone since you may utilize the turret to distract opposing crowds’ attention while shooting from the sidelines and regaining your shields.

The Guerilla tree increases basic combat and weaponry, while the Gunpowder tree increases long-range fighting, and the Survival tree increases Axton’s protection.

Mechromancer

file_3863_mechromancer-1280x720-4205699

The other DLC character on this list is Gaige. Are you a fan of massive robots and explosions? I’ve got some wonderful news for you. “Death Trap,” Gaige’s unique power, allows her to conjure a giant floating killer robot of the same name. Death Trap, like Axton’s turret, is beneficial for deflecting opposing fire.

Many of the Mechromancer’s powers are centered on shock damage. This may be a bit of a mixed bag. Shock is 50% more effective against opponent shields, but it is 10% less effective against flesh. It’s also worthless against zombies, and it actually heals Tankensteins.

Gaige’s Anarchy stacks are the true reason for her excellent ranking. Every murder and every empty clip adds to the chaos. With a maximum of 400 stacks, each stack increases attack damage by 1.75 percent while decreasing accuracy by 1.75 percent. When you combine this skill with the ability to use a shotgun at close range, you have the perfect character for dealing with bosses. After all, point-blank precision isn’t important.

Her Best Friends Forever tree gives you more life, her Little Big Trouble tree gives you more shock, and her Ordered Chaos tree gives you damage, health, and shield improvements.

Gunzerker

maxresdefault-1600125

More guns, more guns, more guns! Salvador is our top choice for the greatest Borderlands 2 character classes, which should come as no surprise to anybody who has played him. Gunzerking permits him to use any two weapons simultaneously, but it’s because of a common hack that makes use of this particular skill that he gets the top slot.

In Borderlands 2, certain firearms may heal the player while doing damage. The Grog Nozzle is exceptionally potent, healing you for 65 percent of the damage it delivers while also slamming foes (which forces them to take additional damage).

When combined with another, more powerful pistol, such as the Unkempt Harold, Salvador becomes nearly unkillable while doing tremendous amounts of damage. This strategy is so flawed that you can use it to force your way through the entire game essentially.

The Brawn tree increases the Gunzerker’s physical toughness, the Gun Lust tree strengthens his weapons, and the Rampage tree increases his stat bonuses.

How To Throw Explosives/Grenades In Fallout 4

0
maxresdefault-20-8

At one time, In Fallout 4, the vast majority of gamers have no idea how to toss grenades. This is due to the fact that action-oriented tutorials frequently fail to instruct players on how to throw grenades or other explosives in that situation.

In addition, the game’s mechanics alter slightly from those of previous iterations. As a result, figuring out how to toss grenades in Fallout 4 by trial and error takes a long time. The greatest way to deliver damage and wipe out a bunch of foes is to utilize grenades. Nonetheless, I’m here to show you how to toss grenades in Fallout 4 in a simple, step-by-step manner.

Equipping Grenades

fallout-4-vats-9910278

First and foremost, go to your weapon inventory. This assumes you picked up a variety of weapons and armor parts, including grenades while roaming the commonwealth. As a result, you should have a handful of grenades in your inventory waiting to be used.

Exit after equipping one of the grenades in your weapon inventory, just like any other Fallout 4 weapon. Don’t worry, this won’t affect the weapons you currently have in the game. A little tip should appear on the screen when you’ve equipped the grenade.

This indicates that the grenade has been fitted and is ready to be launched. That is the first indication that the grenade has been properly fitted. However, this may not always occur; the small hint that shows on the screen may not show at all. If this happens, you’ll have to restart the equipping procedure until the tip appears in the upper left-hand corner of the screen. If you choose, you may even make the grenade your preferred weapon.

You can consult the Help section under grenades if the initial hint (a tip in the top left-hand corner of the screen) doesn’t show or isn’t evident. This is to prevent having to go through the grenade equipping process over and again. Once the grenade is properly equipped, close the menu.

Throwing The Grenade

24868-1525225603-1687013384-4574995

Take your Pip-boy and hold down the right bumper if you performed all of the instructions successfully and are ready to discharge the bomb. Once you’ve aimed at your target and are ready to shoot, hold the right bumper or melee button. Hold the right bumper for as long as you can until the grenade is ready to be released. The default melee button varies depending on whose PC you’re playing Fallout 4 on.

  • PS4: R1
  • Xbox: RB
  • PC: Alt

Meanwhile, you’ll hear a ticking sound, which indicates that the grenade is about to be thrown. The ticking sound is not to be confused with a timer. When you let off of the melee button, the explosion timer will begin.

The grenade is thrown when you let off of the right bumper/plunger, and it will explode at any moment. Just make sure you flung it far enough away from you to avoid the explosion. Before releasing the grenade, you can make an arc. This may be done by gazing up or over, and the distance the grenade will travel before exploding will be determined. If you unlock a Fallout 4 perk to assist you predict the trajectory of your grenade, this will be much easier. The Demolition Expert perk, which grants you a great throwing arc, is the finest in this situation.

shurken-3494798

Make sure you have grenades in your weapon inventory because if you don’t, you’ll have to resort to a melee attack. It’s also a lot easier to equip and discharge grenades if you designate them as favorites. In Fallout 4, unlike previous games, it is not possible to utilize VATS and grenades at the same time.

Despite this, you may still fire grenades before switching to VATS and lighting them up. Even if you’re a good player, new players should be aware that you may traverse numerous levels in Fallout 4 without knowing how to toss grenades.

Where To Get Quarried Stones in Skyrim

0
155bb8b546096c48a0e5462af1e5ae89

Many people neglect how to obtain quarried stone in Skyrim. Quarried stone is an ore block in the Railcraft mod that is used to build a homestead. It was first seen in The Elder Scrolls V: Hearthfire when it spawned in enormous amounts near the forest of biomes. Unlike conventional stone, this building material is obtained using a pickaxe from Skyrim’s Stone Quarries.

Because quarried stone and its variations are more durable and blast-proof than normal stone, they are predominantly employed in construction. It cannot, however, be utilized in any other crafting recipes that need functionality. This article will instruct you on how to obtain quarried stone in Skyrim.

Quarried Stones Locations

maxresdefault-3942691

Players in Skyrim should be aware that quarried stones emerge only after they have acquired land for building. As a result, the first thing they must do is purchase a plot of land on which to build in the game. Perform a map search to locate a place near a stone quarry.

This is especially significant if you dislike mining and would rather have your Skyrim friend gather the quarried stones. Each location features stone veins that might be used to construct a mansion. Stone quarries, sometimes called stone cores, are frequently painted in a light hue. You can hover over a stone core and hit the ‘E’ button after you’ve found it. In the first few strokes, you’ll mine the initial batch of quarried stones.

Stone quarries may be found all across Skyrim and may be exploited for quarried stones. It is the simplest method of obtaining quarried stones; all you need is a pickaxe and a free weight in your inventory.

maxresdefault-3705318

Before they run out of quarried stones, stone quarries may produce up to 4000 units. Considering this, depleting 4000 units of quarried stones in the construction of a house is impossible. As a result, the units of quarried stones generated by a single stone quarry are more than sufficient for construction. At least 48 stone quarries can be found in Skyrim, where you can mine quarried stones. Here are a few of the more frequent ones:

  • Lakeview Manor
  • Windstad Manor
  • Heljarchen Hall
  • Darkwater Crossing – Near the smelter, behind the boxes on the rock face.
  • Riverwood – Located behind the Sleeping Giant Inn and the Faendal’s House on one of the rock faces.

There are so many places to see that I won’t be able to mention them all. Use your map or the Skyrim wiki to look for alternative resources. If you’re going to build, be sure to locate your homestead near a quarry stone.

You may easily find a quarry stone by looking for a location with a lot of white rocks near your property. A pickaxe may be found on the ground if you look carefully. To mine the quarried stones, you’ll need a pickaxe. Take out your pickaxe and start mining the quarried stones in the same location. After acquiring your plot of land, you need 30 pieces of quarried stone to begin construction.

The carpenter’s workbench, chests, and drawing tables all have more quarried stones. Some gamers have discovered quarried stones near rivers and lakes. Also, seek quarried stone deposits near your property in the highlands.

Can You Buy Quarried Stones

I went AFK for an hour while mining quarried stone : skyrim

No, there is no solution to this question. Even though merchants sell a variety of materials, quarried stones are not among them. There are, however, methods for players to spend their money to avoid having to mine quarried stones.

For example, you may escape the trouble of building by purchasing a finished house from management in a certain area. After then, for a set quantity of coins, you can rebuild the structure. The house manager will be in charge of finding quarried stones, which will be taken away from you.

Conclusion

Quarried stones are important materials for manufacturing and building. Particularly for players that intend to participate in industrial crops and estate building. Foundations, walls, and forges are all built from quarried stones. The creation of estates would be impossible without this resource. I hope that this guide has clarified how to obtain quarried stone in Skyrim.

Tips On How To Become More Powerful In Dragon Raja

0
24dcc5c4af5edd7bf4295648ae71abf0

Dragon Raja follows the same path and learning curve as every other MMORPG. This new mobile game not only has outstanding visuals and performance, but it also has an intriguing battle system with a variety of fun skills and multiple methods to boost your strength. In this tutorial, we’ll go over several tips and methods for improving your character in the game, as well as how to stay safe while annihilating everyone who gets in your way.

Your strength, or rating in this game, is a measure of how far you’ve progressed in Dragon Raja. This number represents the sum of all you’ve done and accomplished thus far in the game. In general, the greater it is, the stronger your character will be. In this regard, while your rating will gradually improve as you finish chapters and solve problems in this game, there are additional methods for you to contribute to its growth.

Here’s a quick rundown of what you can do to improve your Dragon Raja character:

Mix Abilities Together With Cancel Animations

dragon-raja-6748589

Dragon Raja’s combat is stiff and not as fluid as in other MMORPGs. Your assaults, with a few exceptions, don’t seem to flow together particularly effectively. Your auto-attack animations are lengthy and sluggish, especially for melee classes.

On the one hand, owing to this rigidity, the battle does not seem as rewarding at first, but on the other hand, it fosters a strategic play style in which you must carefully analyze each move before committing to it, or else suffer when the adversary punishes you with a tremendous strike.

However, using the game’s buffering mechanism to weave skills between your basic strikes, a practice known as animation canceling, is an excellent method to improve your fighting abilities and keep the damage coming.

In a word, this method entails making a skill attack while your character is swinging his weapon. This command will be placed in a queue and executed immediately as soon as your character completes his initial animation, potentially saving you time.

You can keep the pressure up at all times by employing the buffering mechanism and weaving talents in between regular attacks.

Use Your Control Abilities Wisely

dragon-raja-learn-the-game-and-instructions-1024x576-1-4299078

While most classes have defensive or evasive talents to keep them out of harm’s way, some of them also have CC abilities that, rather than moving out of the way, incapacitate the adversary and prevent them from fighting back.

As you might expect, a stunned or knocked down adversary can’t fight back and is vulnerable to attack. As a result, it’s important to keep track of your talents that have extra control effects and make good use of them. A solid CC may enable your squad to effortlessly take out swarms of foes, especially in dungeons and group content.

Utilize Strafing Every Time

dr11-5804756

While buffering skills between strikes is a wonderful technique to maintain the pressure on when confronting the adversary, it won’t assist if you’re continually getting crushed and interrupted. Yes, stringing combinations and striking the adversary is key, but you must also avoid getting hit if you want to survive the toughest battles.

Fortunately, avoiding opposing strikes is largely a matter of remaining mobile at all times, which you may easily achieve simply by moving in one direction while striking. It’s a good idea to turn on the option to keep the camera fixed on the adversary when attacking since this will keep you concentrated on your opponent while you do laps around him. This option may be found in the options menu, under the “Battle” tab—it’s the first choice on this page.

Use Dodging Effectively

dragon-raja_classes-guide_en_9-1593548

Even if you’re moving while fighting, you’ll occasionally need to get out of the path extremely quickly to keep safe and dodge strikes.

If you’ve been playing Dragon Raja for a while, you’ve probably noticed that your movement speed is fairly slow, especially when compared to other MMORPGs where you may whiz over the battlefield at breakneck speed. As a result, evading attacks and harmful AoEs is difficult, particularly given the lengthy attack animations mentioned previously. In this case, rather than manually moving out of harm’s path, you should try to employ your dodge talent, which is tied to your Shift key by default.

Keep in mind that, like standard abilities, you can buffer your dodges so that you may perform an evasive move as soon as your current animation is complete. This is ideal for exploiting a vulnerability and then quickly escaping danger.

By combining these Dragon Raja fighting tips and techniques into your gaming, you’ll be able to not only strengthen your character and raise their rating but you’ll also be able to punish your adversaries while avoiding their assaults.

Best Grim Dawn Build To Dominate The Game

0
grim-dawn-builds-2021-1280x720

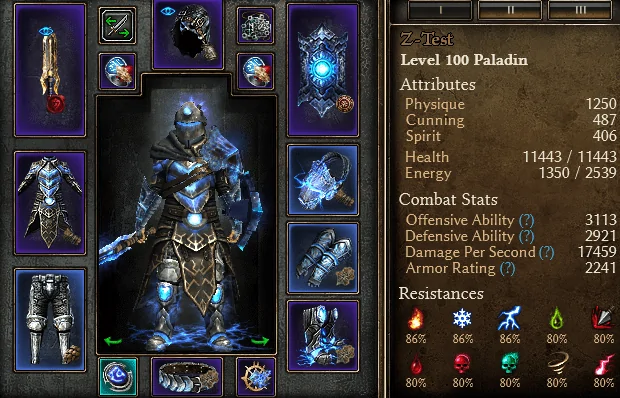
We’ve compiled a list of some of the top Grim Dawn builds for the year 2021 in this guide. Despite the fact that there are already a plethora of action role-playing games, this title has managed to amass a sizable fan base.

It has already received a lot of great feedback for its fast-paced combative type of gameplay. While the tasks of gathering treasure in the form of currency, armor, and weapons may appear simple on paper, the game’s unique gameplay and tough tasks have given a lot of flavor to it.

In a similar vein, it includes several useful builds. When it comes to survival time and harm potential, some might easily outlive the others. All of the builds that score well on both of these qualities will be mentioned in this guide.

These builds will also have the capacity to assist you in reaching the final waves of the Shattered Realm, as well as the capacity to tackle the locked dungeons. This will also assist you in fighting Mogdrogen (the hidden god). So, here’s a rundown of the top Grim Dawn constructions from this year without further ado.

Lightning Build

d93pxqq-3793225

This is a beginner-friendly construction. This build is ideal when you don’t have any gear and don’t want to farm for it. It can help you when you don’t have time to put things together. Instead of an Elementalist, this construct uses a warder.

It has flashbangs, a slower movement speed, and severely bad circuit breakers. Its sole benefits are war cries, intrinsic resistances, blitz, and a smidgeon of DA. You can lower the total damage by adjusting your gear. Furthermore, each person’s ability to value movement differs.

Ritualist

8b95516c5c9080fef8ce2b454b9e66b1-9268241

This is one of the most popular builds among players. However, your mileage may vary if you don’t keen on melee fighting or employing a lot of pet summons.

There is a dual focus here, with the first being summoning monsters to keep the adversary occupied and the second being two-handed weapon assaults that cause internal trauma damage. It may seem counterintuitive to have two caster classes focusing on physical assaults but believe me when I say it works well.

Internal trauma damage penetrates armor and deals damage over time, making it very useful against large tanky bosses. Hammer provides more internal trauma in terms of devotion points, whereas Shepherd’s Crook is required for the pet boost. Make careful to choose a dedication constellation that corresponds to the type of two-handed weapon you’re wielding.

Soldier

riz4qs7-4764708

Many people consider it to be one of their favorite builds, owing to its versatility. In other words, consumers choose to test it out since it can easily be utilized in subclasses. But that’s only one of the numerous advantages. Most of the criteria may be checked off with a strong strike assisted by Cadencea and the ability to deal Pump Vitality and Vitality Decay damage.

Not to mention that the Bat, Wendigo, and Veilwarden should all be considered when it comes to the constellation. All of this serves to demonstrate that its renown is well-deserved, and as a consequence, it has earned a spot on this list of the finest Grim Dawn constructions.

Death Knight

dfvdkrw-6952818

If you like, you may couple it with the other new classes. The build is good, and the gear is within reach. Death Knight’s sole drawback is the lack of regular leveling guidelines. You may gain it by combining it with other builds from other classes.

He possesses a clever brain that enhances his pain tolerance. He’s also supposed to critically attack his opponents and do a lot of harm to them by inflicting internal trauma damage. In a major attack, Death Knight has high energy stats and can draw a substantial amount of energy to live while waiting for regeneration.

Dervish

bc48be6c82997f85dc38536a004eca4a340500b6-3505428

The player population is currently figuring out the ideal secondary class and skill loadout for the Oathkeeper as a brand new mastery. Many players believe that only Soldier or Demolitionist are viable possibilities.

They are completely incorrect (at least for the moment before any future patches). When used with the Nighblade mastery, the Oathkeeper has strong poison and acid synergy. Obviously, you’ll want to equip any items that enhance your total acid damage to get the most out of this setup.

For maximal acid damage output, take up Rat, Eye Of The Guardian, Scorpion, Manticore, Murmur, Abomination, and Yugol The Insatiable Night as devotions. Ghoul is also a good choice because it provides some healing while still allowing you to attack for survival.

Warder

129a2a7dc346717abec162b43233a52a0a63e1be-3902278

With the Lightning (along with Cunning and Spirit) being utilized for attacking, the AoE attack being employed, and weapons in both hands, there’s a lot to talk about with this setup. Additionally, if you have any spare commodities, invest them in Menhir’s Will (Soldier would also be an excellent choice).

You may also use the resistance boosters to improve your protection even further. It’s also important to keep a check on your health, which the Mogdrogen’s Pact and Heart of the Wild could be able to assist with. Overall, including it in this list of the best Grim Dawn buildings was an easy task.

Inquisitor

grim-dawn-inquisitor-build-guides-for-beginners-3259177

One of the greatest starters builds on the market. This is a construct I would suggest to anyone who hasn’t yet reached the expert level of Grim Dawn. It is simple and effective to use in a fight. All you have to do now is work on dual pistols, relic traps, supporting buffs, and elemental damage. If you want to construct your Inquisitor character, there are no recommended devotions; you’ll have to figure out which one works best for you and work on it. You may use your devotions to help you meet certain goals. You’ll have to choose whatever constellation you wish to learn first from now on. Though rising to higher levels with this build may be challenging, damage resistance should be a priority. Choose the optimal gear components for a seamless gaming experience in Grim Dawn.

Conjurer

pwvavji-4238221

The Forgotten Gods expansion tragically weakened many builds, but this one is still viable if played correctly.

This mastery combination is similar to the Ritualist. It focuses on summoning monsters and letting them do the damage while also reducing opponent resistances so your summons can tear them apart with damage types like acid, cold, and lightning.

Ulzuin’s Torch is an excellent concept for devotion points that can be connected to any of your summon skills since it eventually allows you to call down a high-damage meteor swarm with any basic attack. Aside from that, Behemoth, Jackal, and Rhowan’s Crown are all necessary for pet benefits.

Finally, don’t forget about Modgrogen the Wolf, since the final star in that dedication constellation grants you Howl Of Mogrdogen, which offers your pets a significant advantage.

Vindicator

qhvewtk-3602550

This build leaves me with a mixed feeling. On the positive side, Vindicator Build comes with a slew of advantages. These features, such as the simplicity with which it may convert to toad and the simplicity with which it may increase its maximum charge, help cement its place among the greatest Grim Dawn builds of 2021.

Just remember to switch around the devotions before you add more to the charge. On the other hand, some people choose to stay a safe distance from this model, labeling it as one of the most difficult. Well, it ultimately relies on a person’s point of view, and we respect each one of them.

Nightmare’s Vitality Cabalist

fqupn8x-3964520

This is the construct to use on the hardest difficulty setting. You should be able to go on to the following chapter without trouble in Chapter 4. As a result, I believe this is a feasible build that many players should explore.

The vitality cabalist possesses the strength required to face any task. He’s also a lot of fun to play with. Vitality appears to be outmoded for gamers that favor the newer gloomy dawn builds. He possesses a powerful spirit that amplifies the effects of magical abilities. This enables him to fight with charmed weapons, enhancing the flow of energy into his body.

Bloody Pox

maxresdefault-1794198

Your total strength is enhanced by a swift consume and the ability to swiftly debuff swarms. This reduces the severity of the harm while simultaneously increasing your character’s strength. If you decide to upgrade this construction in the future, you’ll need to utilize the Heart of Oak. It might also be done with the help of the Wendigo totem.

Another reason we put the Bloody Pox Build in our list of greatest Grim Dawn builds is the simplicity with which you may double its effect by employing the Soldier’s retaliation effect. Using the Empty Throne devotion or doing afflictions such as riding on the Chariot of the Dead adds to the intrigue.

Spellbreaker

0d8c7e518543a8b88385f243de387b0a8ed03990-2027386

Spellbreaker is the next build on our list of the finest Grim Dawn builds. It’s no secret that this build is best suited for Cold damage, thanks to the utilization of Flash Freeze, Blade Spirit, and Trozan’s Sky Shard. In addition, its TSS rolling is deserving of your notice. Whenever you observe a group of foes gathered in one location, utilize TSS without hesitation.

What about a caster, though? Pneumatic Burst and Sphere of Protection have you covered. Now, if we’re talking about tsunamis, Tsunami and Amatok are two names that come to mind. The latter might be useful to the Spirit of Winter.

Pyromancer

20888141-2787673

With the assistance of the Solael’s Witchfire, the Occultist/Demolitionist build has a high probability of dealing Chaos and Vitality damage. You always have the option of employing Stun Jacks or Flashbang, as you would have predicted. But before you do it, make sure you have weapons in both arms.

Furthermore, if they have long-range capabilities, it may be the cherry on top of the cake. Also, don’t forget to check out Summon Familiar and Mend Flesh if you like multiplayer. This, along with either the Hellhound or the Doom Bolt, would offer you a significant advantage over your opponents.


Best and Most Powerful Weapons To Use In Bloodborne

0
maxresdefault-19-9

Bloodborne was a challenge for everyone, including Souls veterans, when it was launched in 2015. The massive armory of Bloodborne weapons, as well as how each weapon interacted with different character builds, was a part of the problem.

Souls gamers have become accustomed to seeing their favorite tools reappear in every FromSoftWare game, implying that their winning techniques were typically transferable. This paradigm was ripped to bits by Bloodborne.

While a choice in the Dark Souls games, Bloodborne pushed players to participate in an aggressive form of fighting unfamiliar to many gamers. Blocking became almost totally useless as attacking became the strongest method of defense.

This made the weapon you pick to construct your character around in Bloodborne even more important. Because, though any weapon in the game is viable, it must be used correctly in order to be effective. Of course, not every weapon is useful, but the most powerful ones are virtually always.

Saw Cleaver

bloodborne20best20weapons20saw20cleaver-9313902

No, it’s not a joke: the Saw Cleaver is one of Bloodborne’s greatest weapons. It’s adaptable, quick, and completely free! A Hunter can pick the Cleaver at the start of their run and use it without incident all the way through. Whether you’re facing a single opponent or a large group, this weapon can handle everything.

Strength and Skill scale nicely with the Cleaver. Hunters can also cover it with any of the game’s item perks as a bonus. When you reach the endgame of Bloodborne, you’ll want to move on. Even if you decide to stick with the Cleaver, you could do a lot worse.

Simon’s Bowblade

maike-stegers-1-4292211

From the most towering and fearsome bosses to the most common mobs, Bloodborne’s opponents largely employ the same fight techniques as the other Dark Souls games: they rush you and try to shred you into sad, defeated hunks of failure.

As a result, their AI isn’t generally very good at dealing with ranged damage. Simon’s Bowblade, a DLC weapon, shines in this area. It starts as a conventional strong curved blade, but when the player levels up their Bloodtinge, it turns into a bow that can do deadly damage. It can take down a lot of adversaries from a safe distance, but it’s a touch sluggish to operate and aim with.

Beast Claw

beast_claw-0-4881498

Let’s start with a weapon that, in the first place, absolutely negates the aim of hunting. The Beast Claw was formerly a handy little gadget that was mostly used for Wolverine cosplays. Then came the release of The Old Hunters DLC, which gave us the Beast’s Embrace rune, which completely changed the way the Beast Claw functions!

The enhanced Claw allows users to make quicker attacks, move in surprising ways, and gain Beasthood over time. The catch is that you must transform into the animals we’ve been chasing from the beginning! Aside from your appearance, your protection decreases as your Beasthood level grows. A Chalice Dungeon is also the only place to locate the Claw.

Church Pick

maxresdefault-3737967

On the surface, the Church Pick, which ranges from a large sword to a war pick, does not stick out as one of the game’s better weapons. Its altered form causes astonishment-inducingly minimal damage, a rarity among Trick Weapons. The Church Pick’s changed condition, on the other hand, lets the user utilize incredibly reliable stunlocks.

When stunlocked properly, the Church Pick becomes one of the strongest weapons in the game regarding combo potential. Because of the incredible range of the modified Church Pick, stunlocking an adversary isn’t difficult. Comboing comes at a cost, and a small amount of damage is the price to pay.

Kos Parasite

maxresdefault-2241652

Another weapon that completely misses the idea of what it means to be a Hunter on a cosmic level. On the surface, the Kos Parasite doesn’t appear to be much. It’s true that in the wrong hands, it’s not very successful. If you have the Milkweed rune, though, you will turn into a massive cauliflower with cosmic power!

Players get a completely new moveset and a gigantic makeover, just like the Beast Claw. The unique abilities that Kos Parasite has over the Claw are what give him the upper hand; press L2 to launch a powerful AOE strike that melts unprepared adversaries!

A Kos parasite bearer with enough Arcane points can one-shot most opponents and a few monsters! The fact that you’ll have to receive the parasite from Kos himself is perhaps the largest disadvantage of this weapon. “There will be no pity for that disgusting creature!”

Ludwig’s Holy Blade

ludwigs_holy_blade-in-game-2-6766665

A middle-of-the-road weapon that was significantly over-used in its prime sits in the center of our list. Ludwig’s Holy Blade is one of the greatest alternatives in Strength and Quality (Skill/Strength) builds. However, if you don’t properly improve your Hunter, this weapon will be your only choice.

LHB has a lot of advantages; both of its forms are fantastic, it deals fair damage, and it can make use of all of the buffs! LBH, on the other hand, isn’t very strong in any one area. No matter how many times you improve it, you can’t get any of its stats to S. Still, in Bloodborne, this is the closest you’ll get to wielding the Buster Sword. To get this sword, locate the Radiant Sword Hunter Badge.

Rakuyo

maxresdefault-4985496

The Rakuyo is a superior variant of the Chikage in many ways. It removes the Chikage’s personal restrictions and employs a move set comparable to that of the weapon. However, the Rakuyo is not a carbon copy of the Chikage, and it has its own set of strengths and limitations to balance things out.

The Rakuyo is technically a dual-wielded weapon, which alters the player’s control scheme. Simultaneously, learning this control technique transforms Rakuyo into a beast of a weapon. Of course, because this style of play is incompatible with other weapons, it isn’t a talent that can be applied to other weapons.

Holy Moonlight Sword

bloodborne_20160913153103

LHB’s elder, sexier sister, The Holy Moonlight Sword, lives in the Hollywood Hills and has a seven-figure job. Here’s your Huckleberry if you want to make a Strength/Arcane build with a more mystical bent. If you’re worried about the absence of S’s on this weapon’s stat sheet, don’t worry! The HMS takes precedence over little details like odds and numbers!

It’s a one-handed claymore in its most basic form, which your Hunter will sling over his shoulder like a boss. The HMS’s greatest might is unleashed after it has been converted! You can start tossing laser beams about at the cost of your Quicksilver bullets with the push of a button.

Tap L2 to unleash a devastating thrust that may knock some of the game’s toughest opponents unconscious! The MHS’s only significant flaws are that it’s a DLC weapon that drains Quicksilver ammunition completely. Furthermore, you must defeat Ludwig in order to obtain it, which is considerably easier said than done.

Hunter Axe

gecco-bloodborne-arsenal-axe-004-928x483-7073815

Although the Hunter’s Axe is a starting weapon, it is not only the greatest of the lot, but it is also one of the greatest weapons in the game. There’s no reason not to utilize the Hunter Axe, which has perfect availability, outstanding scaling, excellent range, and is good both Tricked and otherwise. It’s also one of the most powerful weapons in the game in terms of sheer damage.

It may be used in various ways as a weapon and does not fit well into any one category. It can be a superb one-on-one weapon, it can easily crowd control, it’s really beneficial in almost every boss battle, and players will never feel like they’re doing chip damage with it. It’s not the finest weapon in the game, but it’s close.

Evelyn

aa470959d5710cee3c8c4700428b2909-3377226

FromSoftware intended bloodborne to discourage overly defensive play; shields are useless, healing options are limited, and firearms deal minor damage. They do, at least towards the start of the game. Firearms may be lethal if a player commits to a Bloodtinge build and stocks up on Bonemarrow Ash.

Evelyn is the reigning queen of Bloodborne’s weaponry, even after considering the Old Hunters DLC. By a long shot, she outclasses and out scales all of the other weaponry in the game. If you equip her with Bonemarrow Ash, you can effectively kill any of the game’s bosses! Evelyn is worth maintaining as an offhand weapon even if you aren’t utilizing a Bloodtinge build. To gain this beauty, travel to Cainhurst Castle and fight your way past its inhabitants.

Whirligig Saw

91yid6tvril-_ac_sl1500_-9569908

The Whirligig Saw is one of the game’s most basic, violent, and terrifying weapons. There’s no denying that this is one of the most effective and strong Strength-based weapons in the game. Half mace, part savage, flesh-rending saw, there’s no disputing that this is one of the most efficient and powerful Strength-based weapons in the game. It would be voted the strongest by many gamers.

When completely upgraded, the Whirligig Saw (which has S scaling in Strength) lets the player hold L2 to grind through foes indefinitely (as stamina allows). Its damage output is incredible, preying on the vulnerabilities of beast opponents in particular. You’ll have to endure the DLC to get it since it’s hidden on a slight hill on the route leading to the Nightmare Church.

Chigake

chikage-6348516

The Chikage is possibly the only other weapon in Bloodborne that can be compared to Simon’s Bowblade in terms of sophistication. Hunters are encouraged to move between their modes regularly by both the Chikage and the SBB. These two weapons both scale well off of Skill and Bloodtinge, making them excellent complements.

The Chikage, on the other hand, is a difficult weapon to master. This sword begins to drain the health of its wielder after it has been changed! The damage boost provided by the converted Chikage is amazing. However, an inexperienced Hunter may accidentally murder oneself in the midst of a battle! You’ll be able to do incredible levels of damage after you master this weapon. However, the Chikage requires that you utilize it in a precise way. If you ally with the Vilebloods, you’ll be rewarded with this blade.

World of Warcraft: Shadowlands Using Newest Lighting Technology

0
wtfast-8rggniy2v8c-unsplash

World of Warcraft (WoW) is one of the oldest games online, with players enjoying it worldwide for more than 16 years now. It may be one of the oldest games, but it doesn’t mean that it still has its decade-old graphics.

With its continuous improvement, an installment of the game, World of Warcraft: Shadowlands is now the fastest-selling PC game of all time.

World of Warcraft has its own system. Its economy and currency involve gold, referred to as WoW Gold. These are used to repair armor, flight paths, and craft reagents, among others. The problem is, World of Warcraft: Shadowlands does not have oversized gold sink items. Players can farm their coins or golds on their own, but they can also delegate such a routine.

WoW: Shadowlands Settings

World of Warcraft: Shadowlands is a massively multiplayer role-playing game (MMORPG) that appeals to players from different locations and backgrounds. It provides entertainment and convenience as it promotes communication and teamwork with your friends. This will help players develop leadership skills, complex problem-solving skills, and the ability to deal with unexpected consequences.

In this game expansion of World of Warcraft, the location is set primarily in the eponymous region of the Shadowlands. The story deals with the return of Sylvanas Windrunner, the fallen leader of Horde, who breaks the barrier between the mortal world of Azeroth and the Shadowlands – the realm of death.

Hidden realms of horror and wonder await anyone who will pass to the afterlife. The Shadowland is home to the departed souls. Players can be one of Azeroth’s greatest champions. They will be granted the power to cross over from Azeroth to Shadowland in body and soul.

Shadowlands: The Four Covenants

Choosing a covenant is critical as it will affect your character’s gameplay and performance. And although you can switch covenants, it’s best to be wary of your options and situations before you do so. Switching covenants means losing your previous covenant perks such as abilities, Sanctum progress, soulbinds, and Renown.

Players must investigate a conspiracy to help the Warcraft legends journey back and fulfill their ultimate destiny.

You can align yourself with the four covenants of Shadowland or shepherds of the dead. Each covenant has its motives, ambitions, and incredible powers to claim as your own.

The four covenants include.

Kyrian of Bastion

The steadfast Kyrian of Bastion, whose duty is to safeguard souls from the mortal realm while they pass into the Shadowlands. They are akin to angels and are considered Soul Guides as they escort souls from the living and the dead.

Here’s what you get when you allied with Kyrians:

  • Summon Steward
  • Phial of Serenity
  • Kyrian Armor and Weapon Transmog
  • Phalynx and Eternal Plalynx of Purity mounts
  • Ruffle (owl pet)
  • Access to Eternal Gateway transportation

Night Fae of Ardenweald

The mysterious Night Fae of Ardenweald, who fiercely defends the spirits of nature from those who won’t allow them rebirth. They are the guardians of nature and shepherds of life and death.

Here’s what you get when you allied with Night Faes:

  • Soul Shape
  • Night Fae Armor and Weapon Transmog
  • Shadeleaf Runestag and Enchanted Shadeleaf Runestag mounts
  • Trootie
  • Access to Fae Circles transportation

Venthyr of Revendreth

The cunning Venthyr of Revendreth, who devours the souls of the vain and prideful in the gothic realm and torment. They are the punishers of the unworthy.

Here’s what you get when you allied with Venthyrs:

  • Door of Shadows
  • Venthyr Armor and Weapon Transmog
  • Sinfall Gargon and Gravestone Battle Gargon mounts
  • Sinheart (pet rock)
  • Access to Mirror Network transportation

Necrolords of Maldraxxus

The warlike Necrolords of Maldraxxus, who molds the armies that serve as the first line of defense for the Shadowlands.

Here’s what you get when you allied with Necrolords:

  • Here’s what you get when you allied with the Necrolords:
  • Fleshcraft
  • Necrolord Armor and Weapon Transmog
  • Plaguerot Tauralus and Armored Plaguerot Tauralus mounts
  • Jiggles (owl kitten)
  • Access to Bone Deathgates transportation

You can also test your limit as you ascend to Torghast or the Tower of the Damned. This tower is a highly replayable and ever-changing dungeon in the dark heart of Maw, where the vilest souls are locked forever.

How Lighting Works in World of Warcraft: Shadowlands

To make World of Warcraft: Shadowlands more fun and exciting, WoW engineers update the game’s technology with every expansion.

WoW: Shadowlands is the eighth expansion of the game. The lighting effect called Ray Tracing might be hard to notice but is a massive addition to the scenery of the game. This newest lighting technology enhances the player’s complete involvement when going through the game.

What Ray Tracing Do and What Graphic Cards Contain It?

Ray tracing technology converts light into the continuous flow (streams) of pixels, so these streams’ movement can be displayed in real-time. When a light (beam) line or ray-traced light hits the object, the pixels are reflected and refracted. This will create realistic effects, especially the real shadows that move. The rays that were absorbed by the object reflected or refracted can hit other objects.

The technology has been used in pre-rendered game theater and animated films but wasn’t used in games. Ray tracing was only used in games like WoW: Shadowlands when the best graphic cards were introduced, including the technology that speeds up the speed that is acceptable to games.

The lighting in WoW: Shadowlands is created by overlapping effects that range from twilight to particular spotlights being thrown by individual characters or from the bright daylight. The light varies depending on the weather, time of the day, location in the game such as indoor or outdoor, map phases, etc.

The Evolving World of Warcraft

WoW engineers used a complex high load system like ray tracing to balance new technology and a hardware-friendly approach. They are always looking for ways that can enhance the visual quality of World of Warcraft. At the same time, they maintain the iconic art style of the game.

The ray-tracing technology is realistically soft and mimics the light of the real world. This makes the game more enjoyable for players. Having good gear using affordable WoW Gold can also level up the fun and excitement.

Recent Posts